Overview
When NSX is already configured on a cluster with a specific VDS (Virtual Distributed Switch), you may need to secure additional workloads running on separate VDS instances. This scenario occurs when additional uplinks are configured on physical ESXi hosts and connected to a new VDS for different services. This guide covers two approaches to protect workloads connected to the new VDS using VLAN-backed networks.
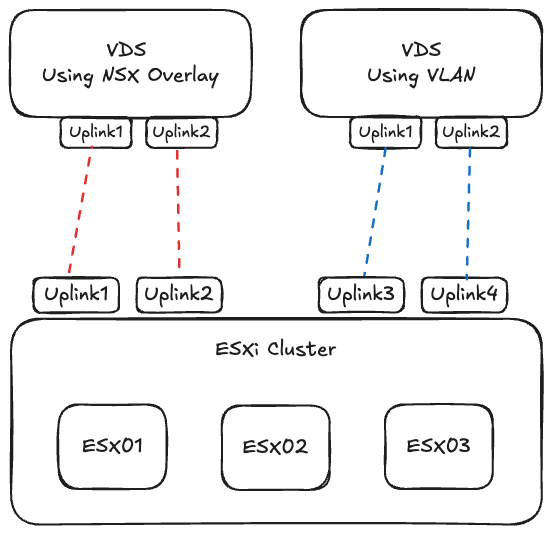
The diagram above illustrates the target architecture where NSX security is extended to protect workloads running on additional VLAN-backed VDS instances while maintaining the existing NSX configuration on the primary VDS.
Prerequisites
- Additional VDS configured with VLAN-backed port groups
- Physical uplinks properly configured on ESXi hosts
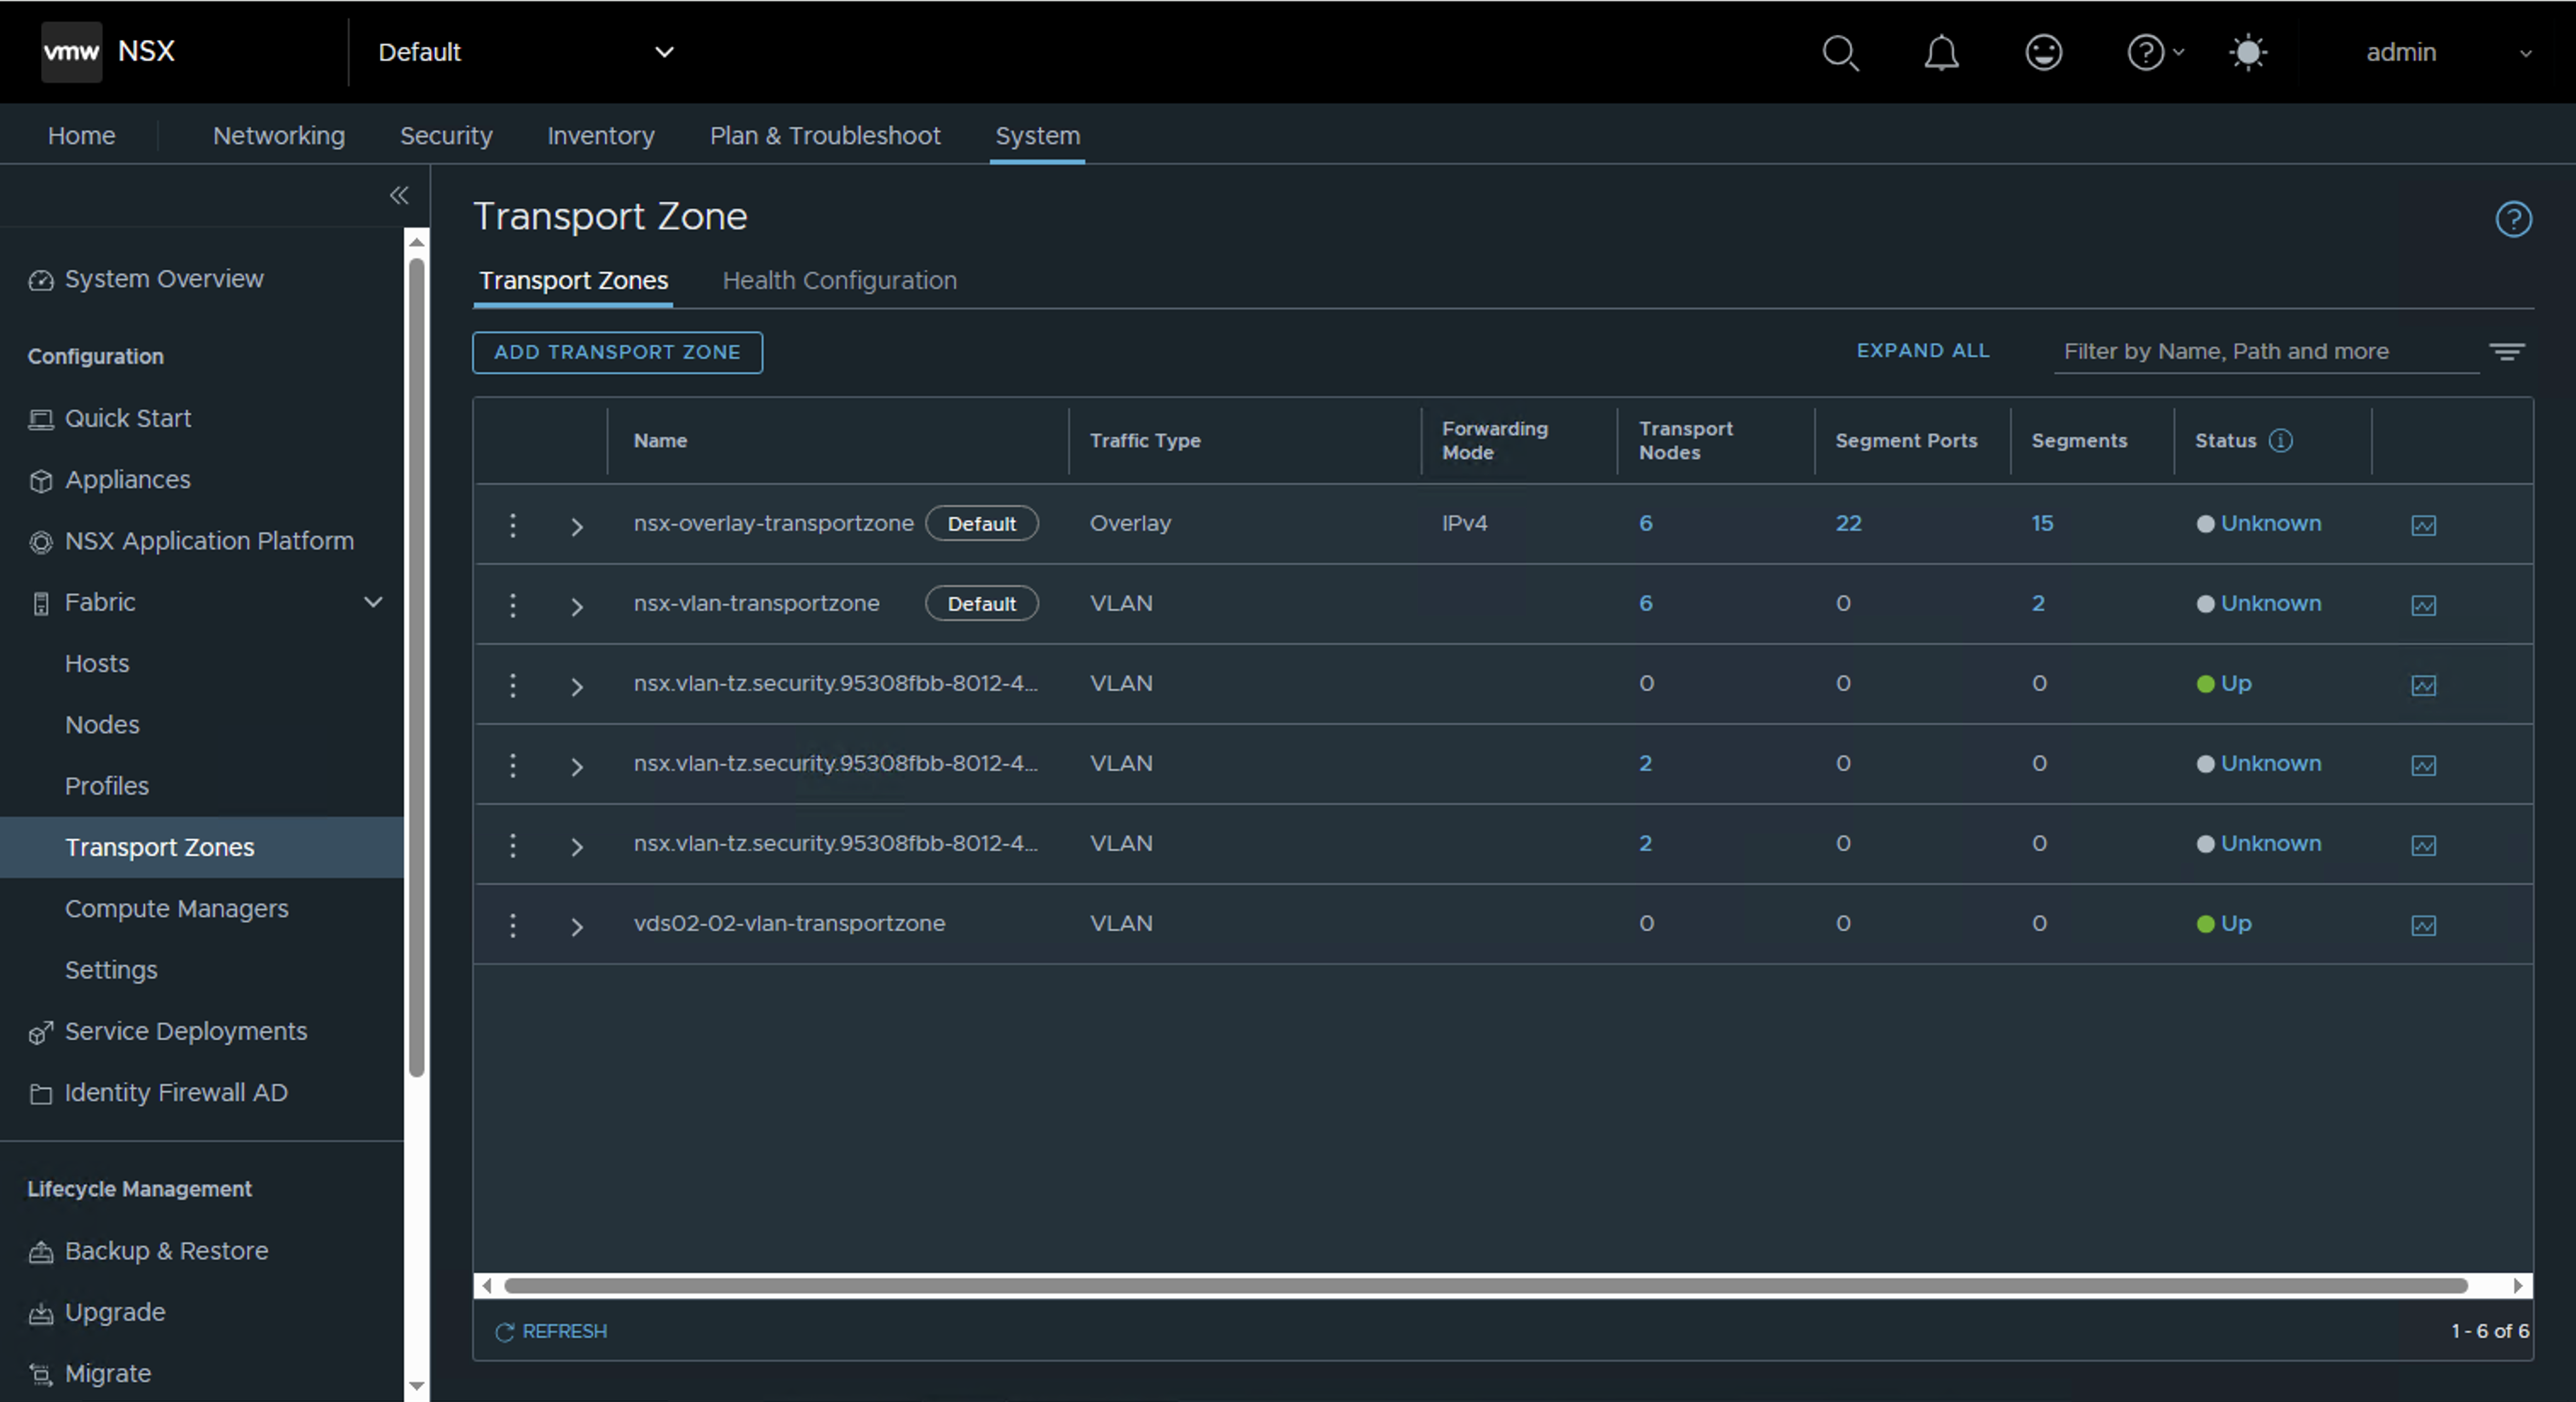
Configured VDS in NSX enabled cluster
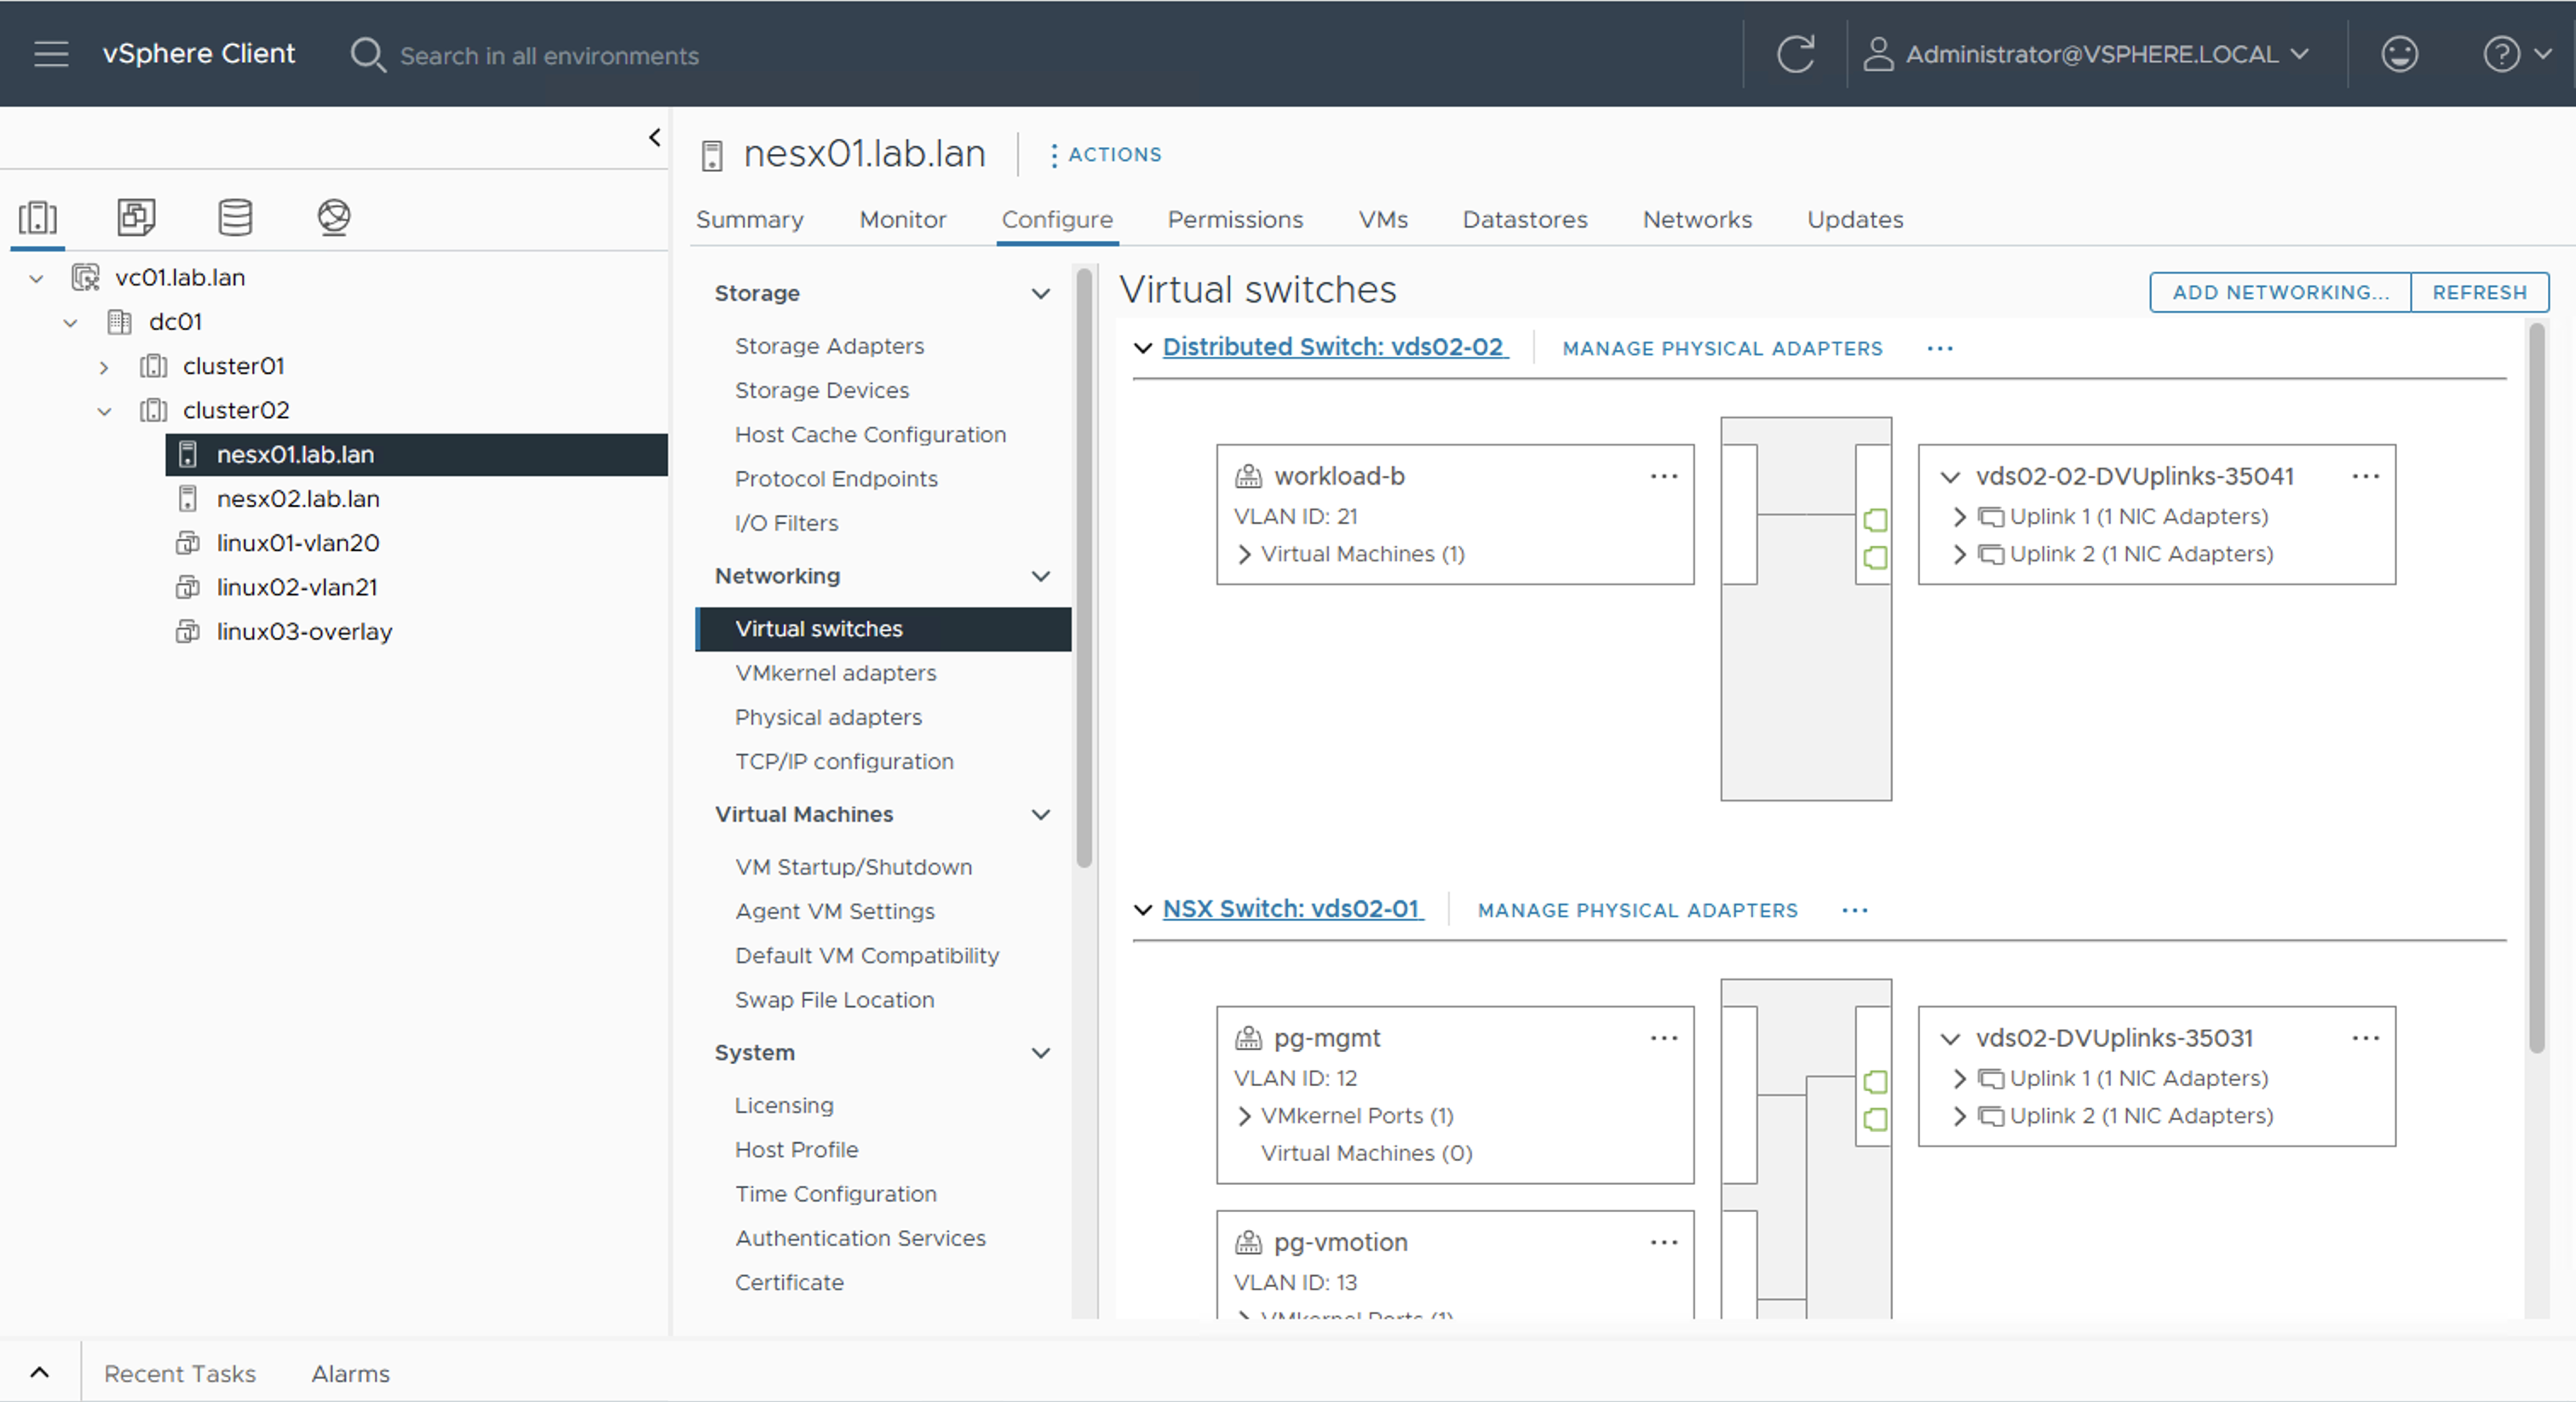
In the screenshot below, you can see the currently configured VDS on an ESXi transport node. One VDS is NSX enabled, while the other is not yet part of the Distributed Firewall (DFW).
Option 1: Using NSX VLAN Backed Segments
This approach creates dedicated NSX segments for your VLAN-backed workloads, providing granular control and security policies.
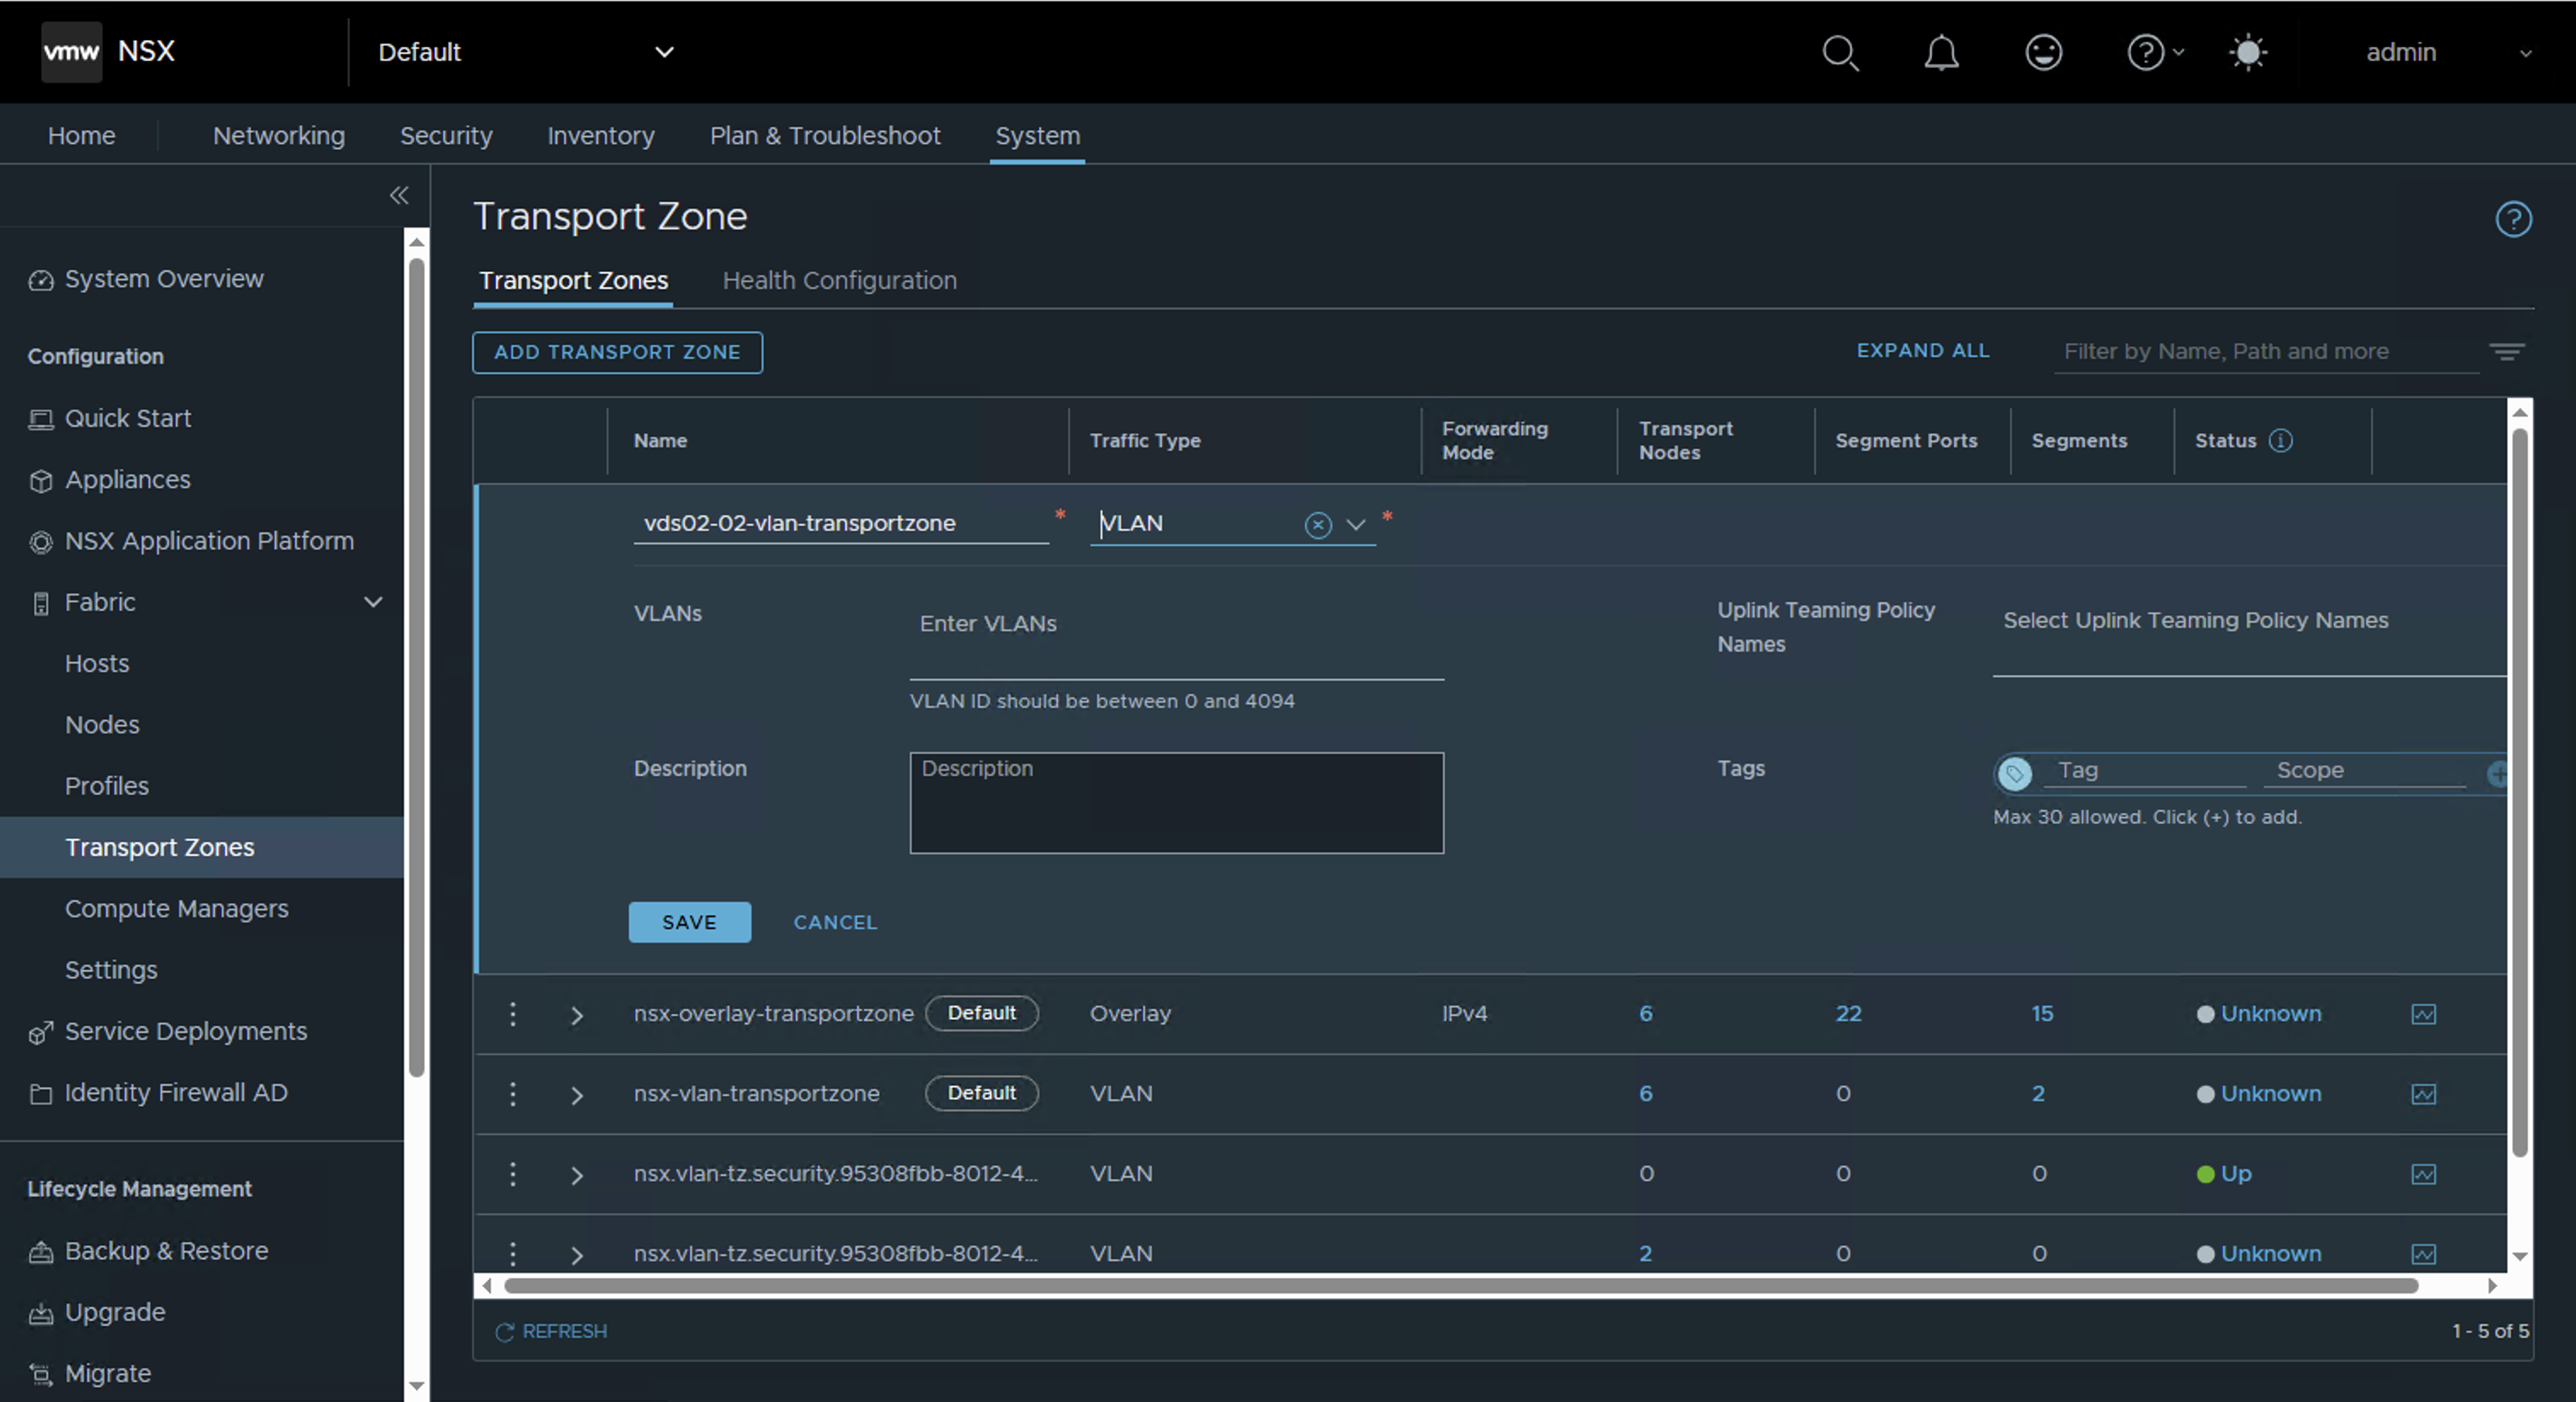
Step 1: Create VLAN Transport Zone
Create a new VLAN traffic type transport zone. Remember that transport zones should be unique per host switch within a transport node profile.
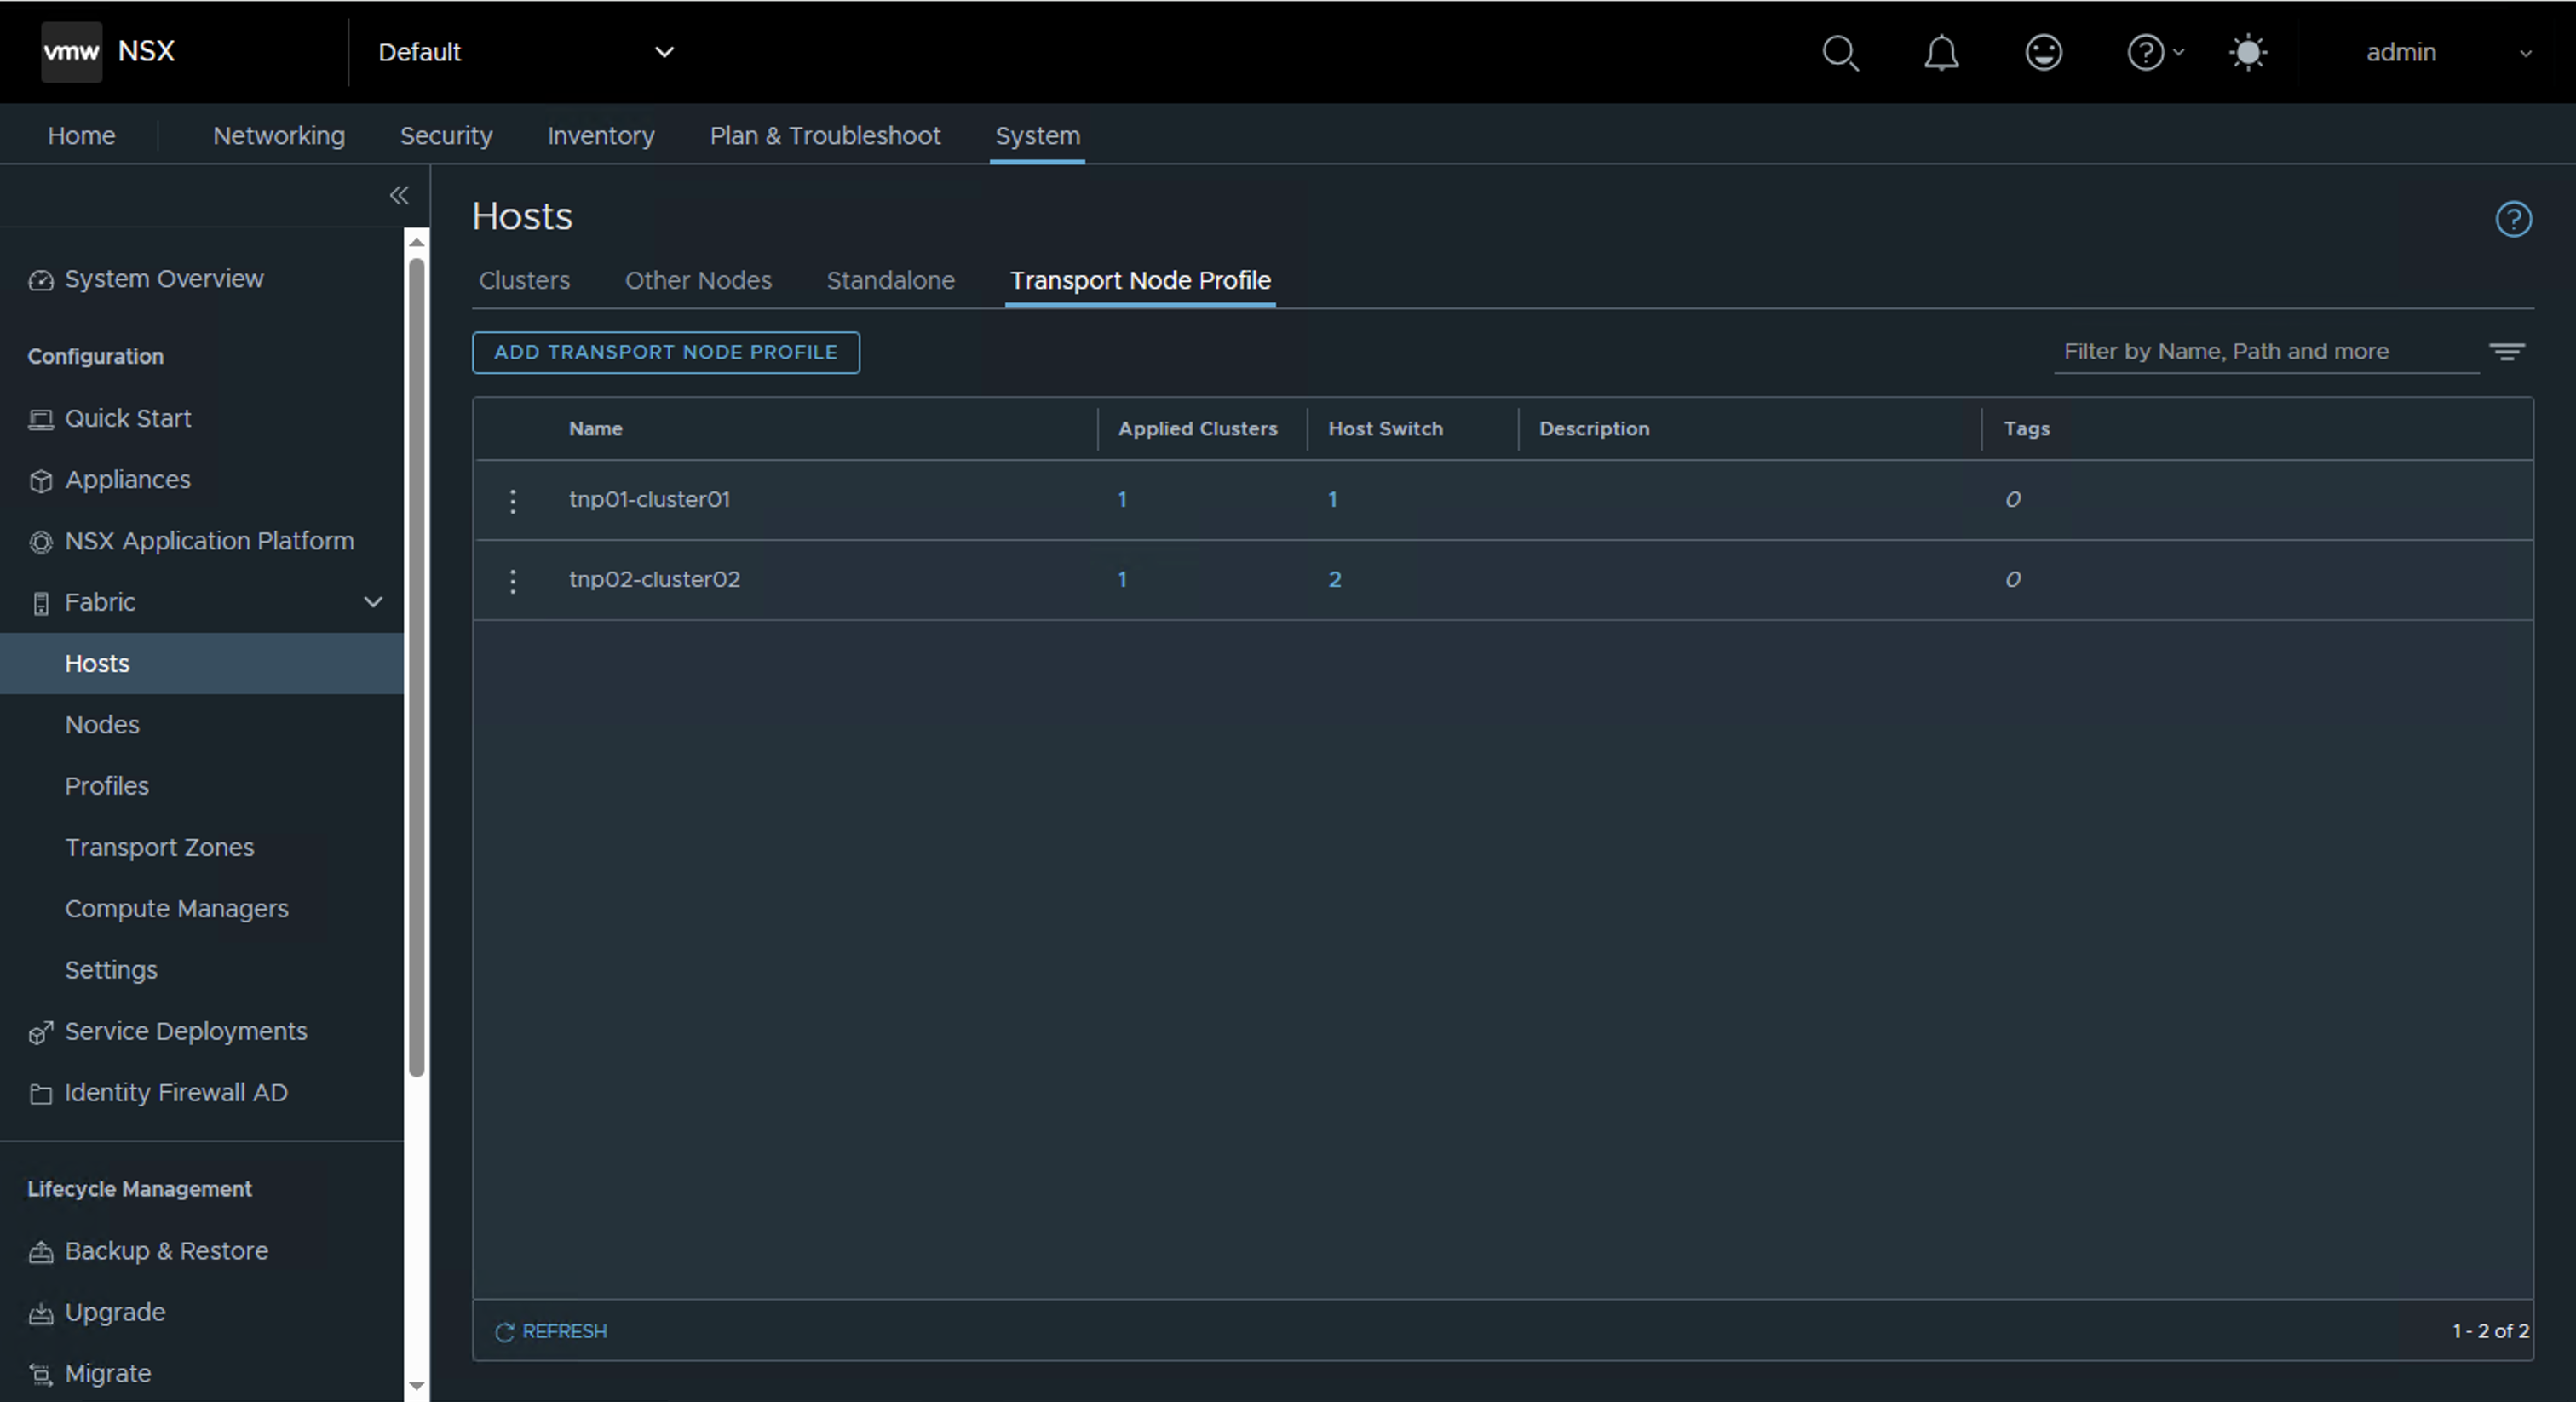
Step 2: Review Transport Node Profile

Check the currently configured transport node profile to understand the existing setup.
Step 3: Configure Host Switch
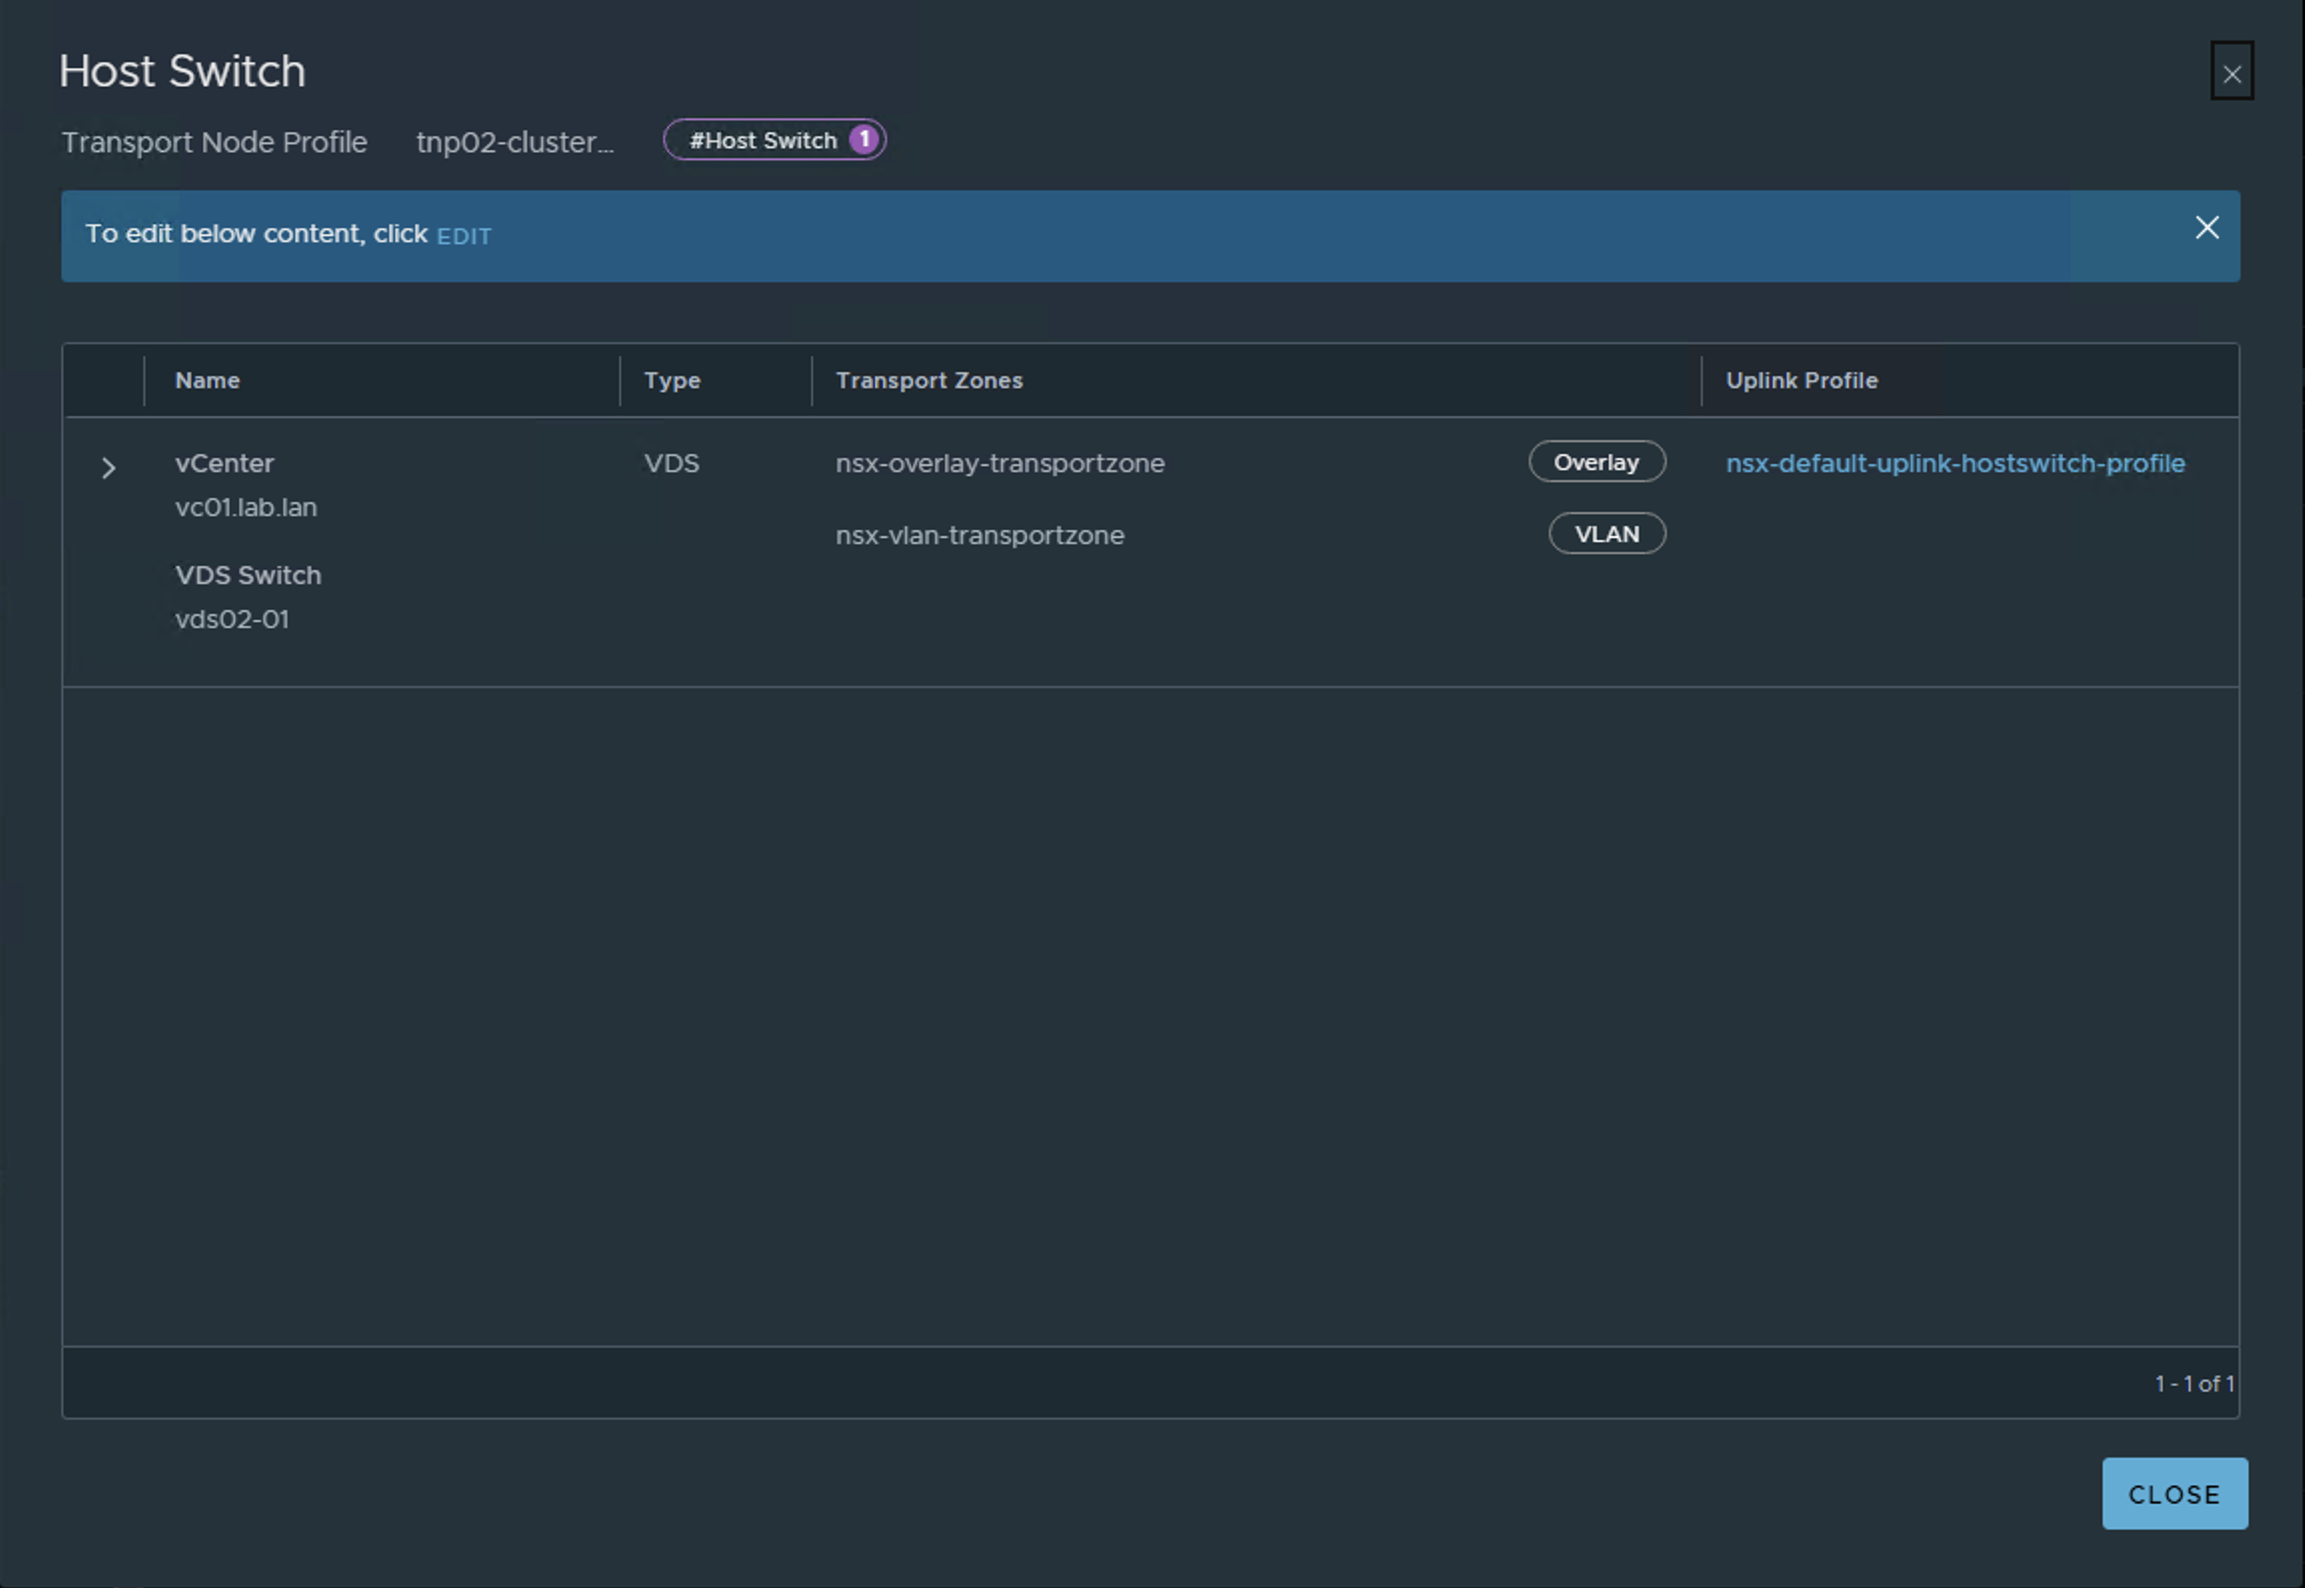
Edit the host switch section in the transport node profile.
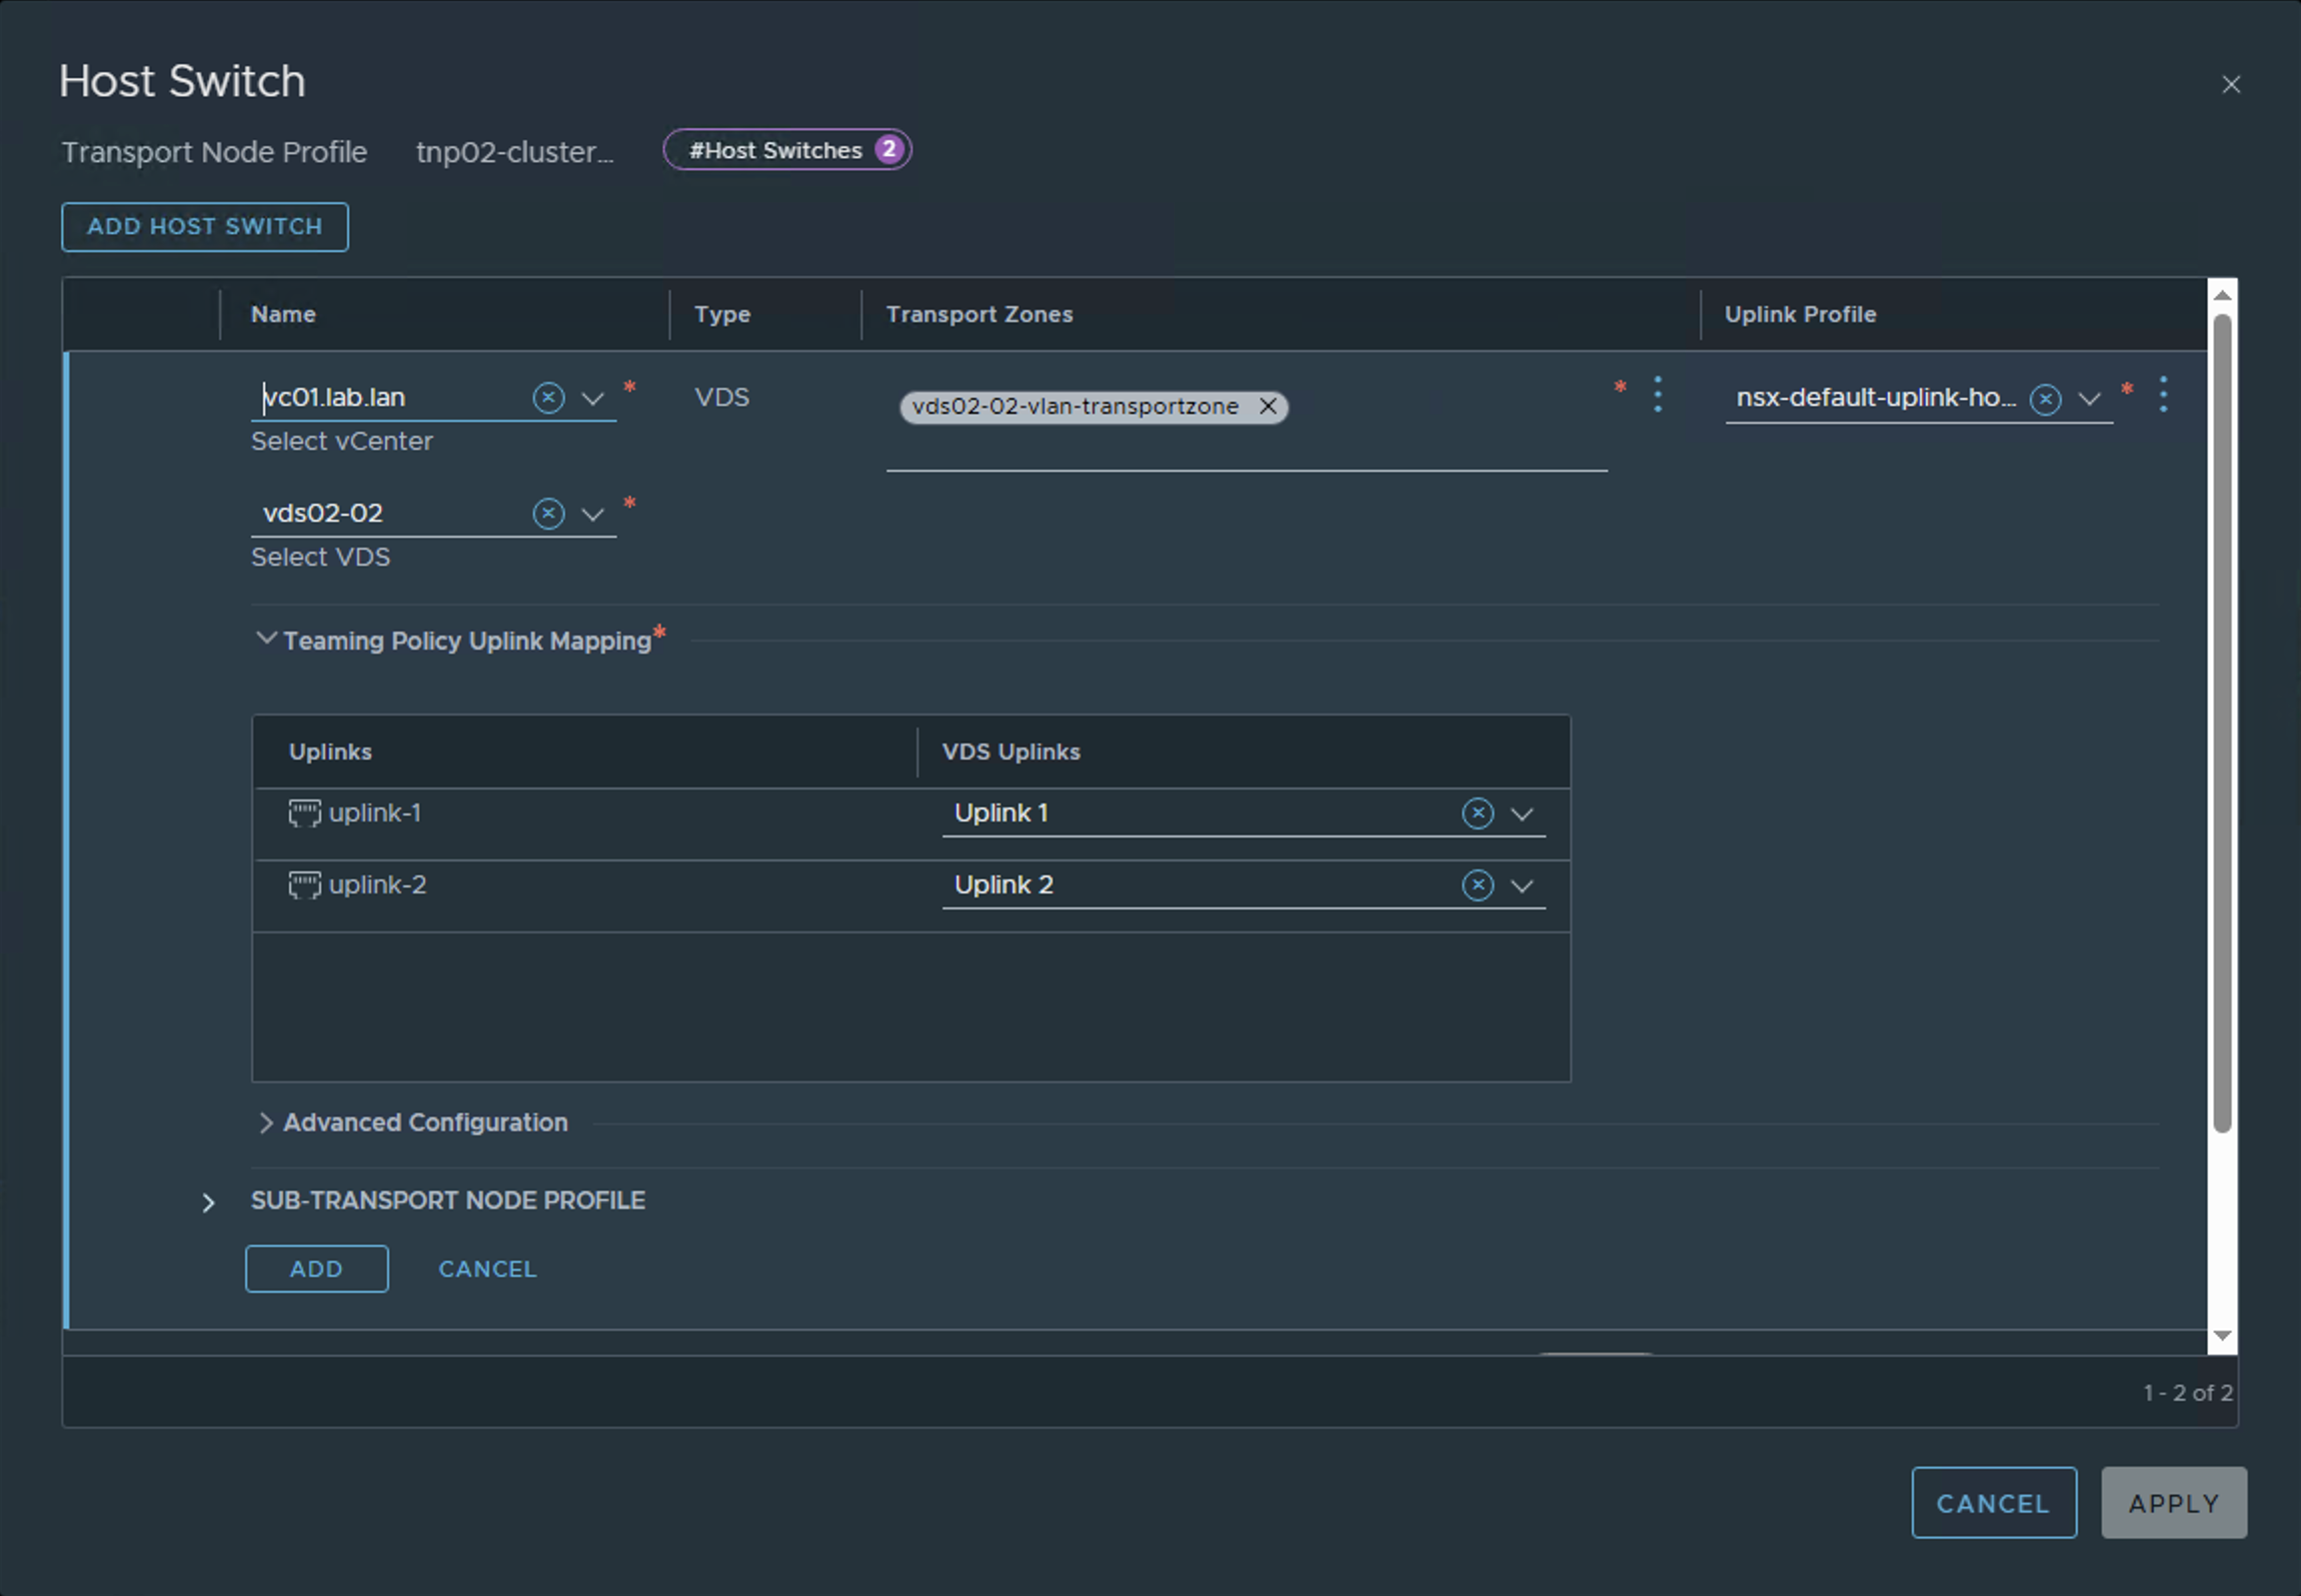
Step 4: Add Second VDS
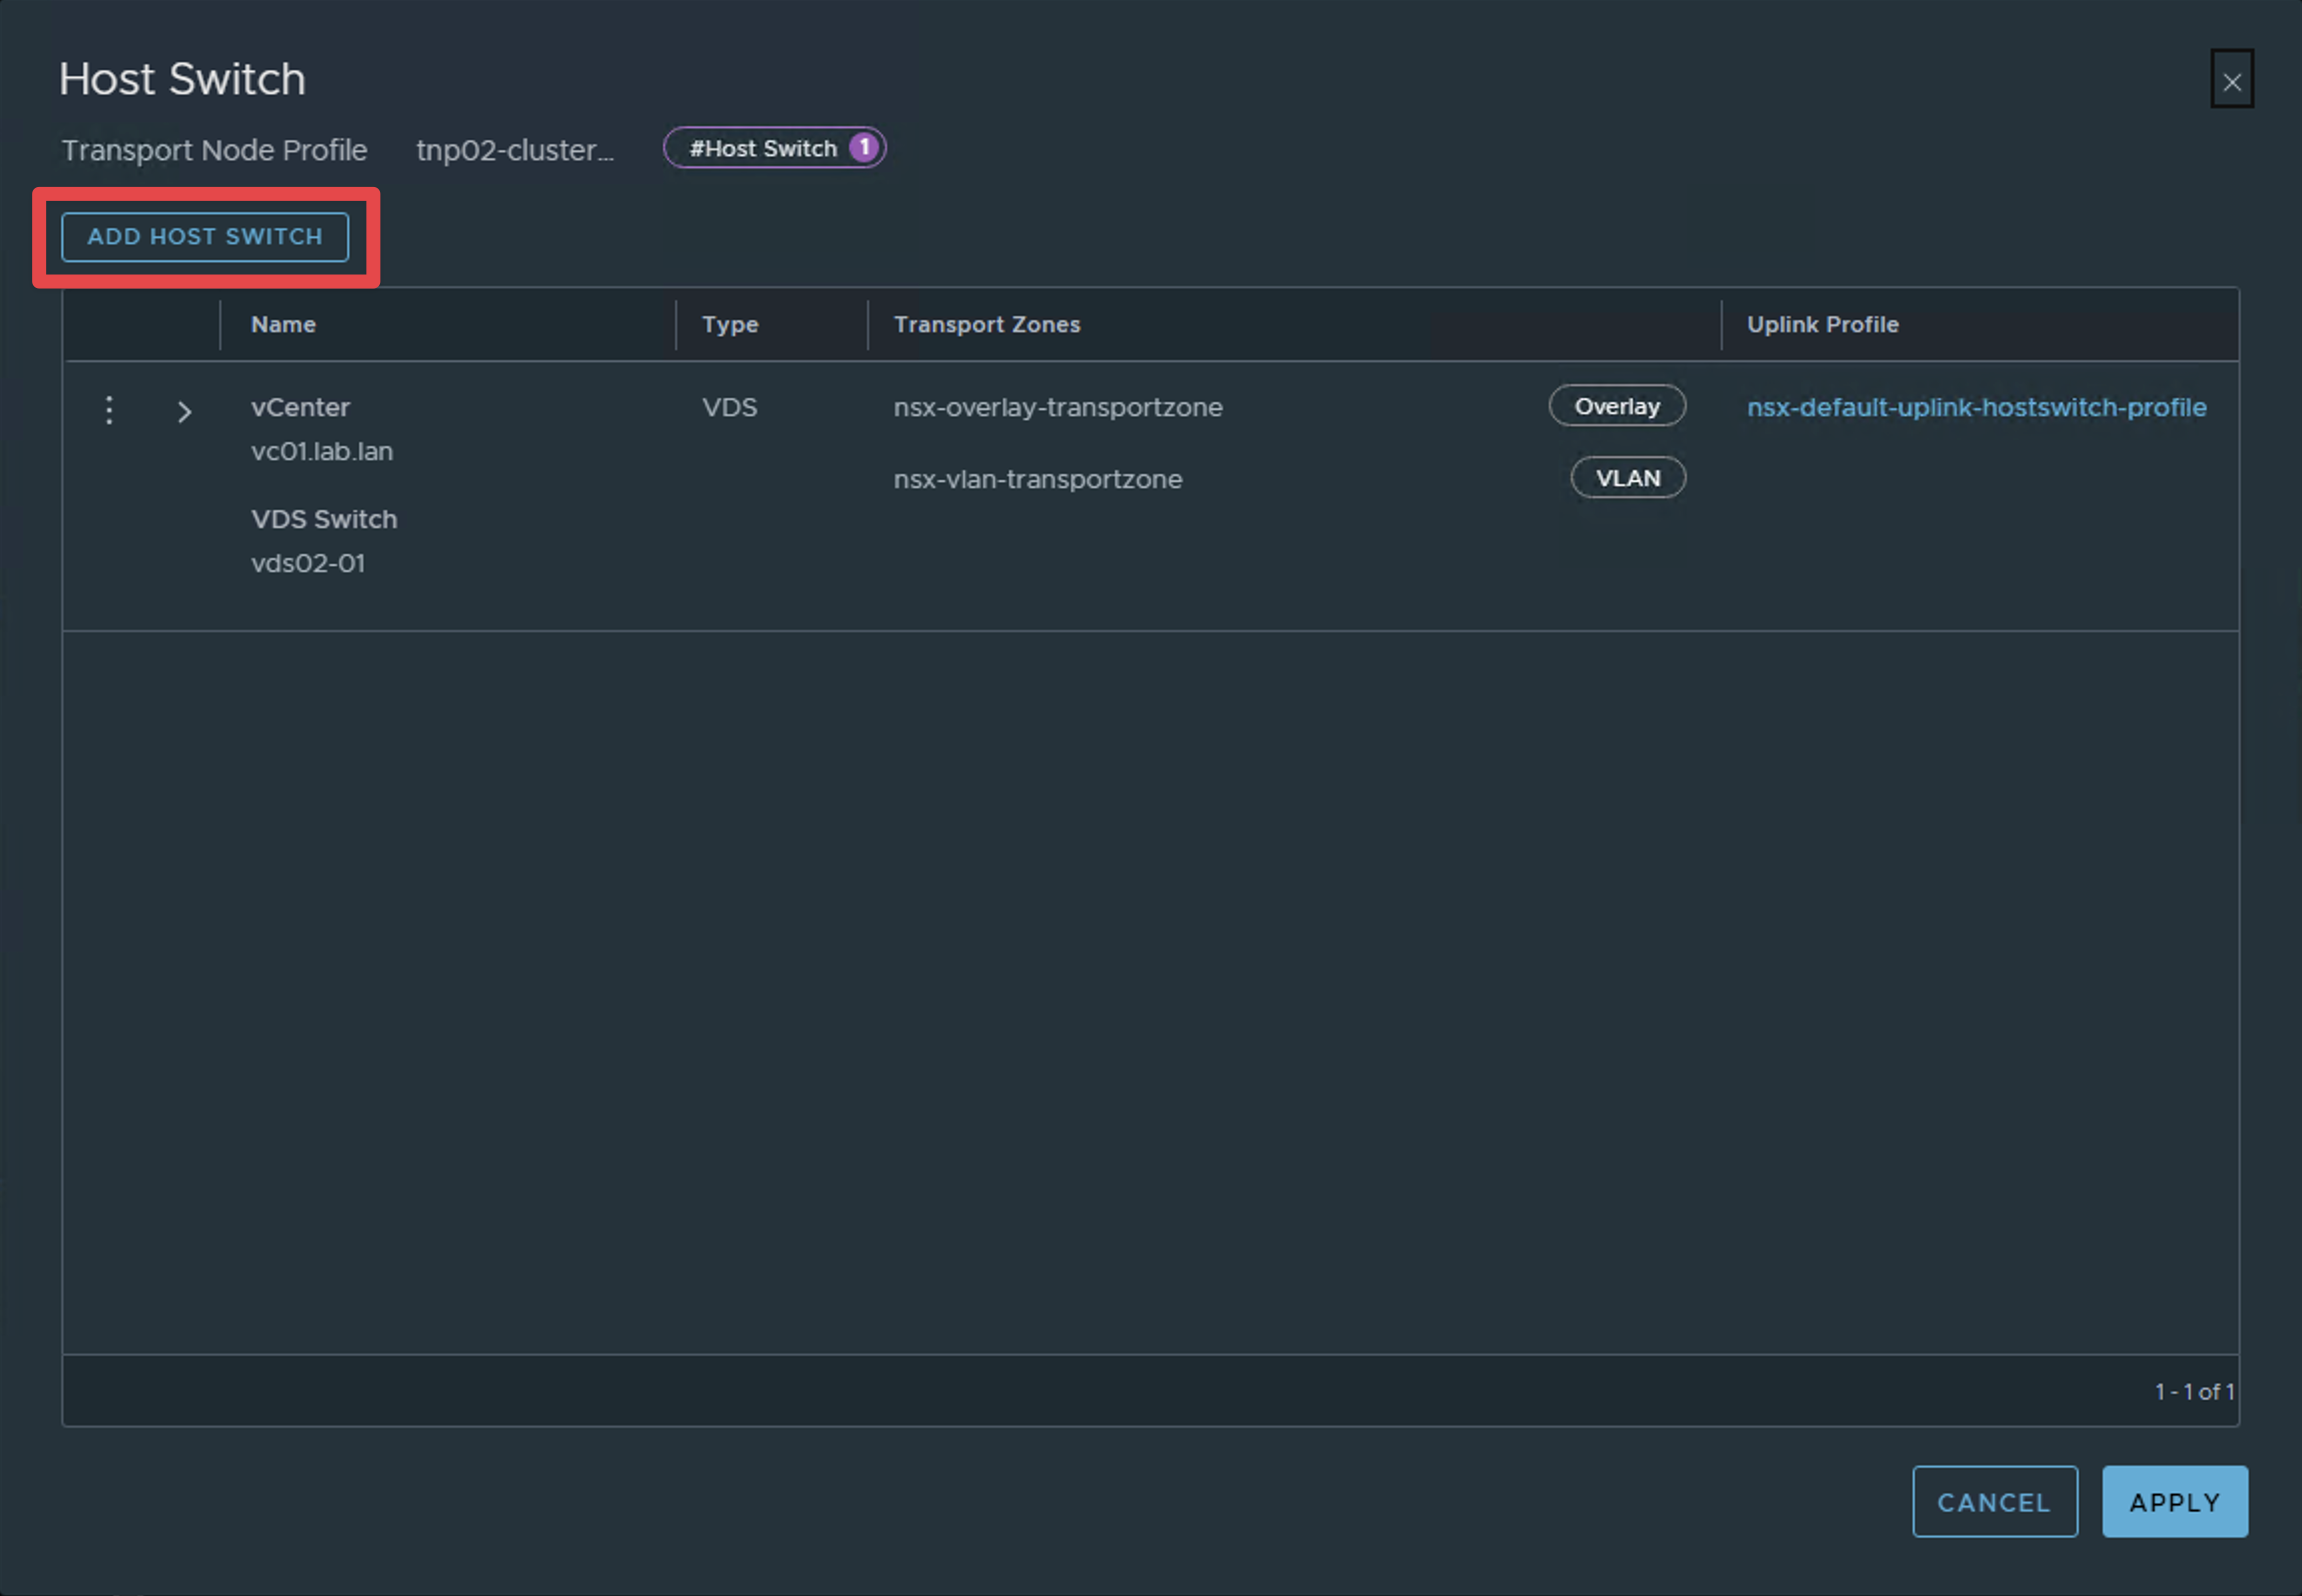
Click "Add Host Switch" and configure it with the second VDS that is backed by VLAN.
Step 5: Create NSX VLAN Segments
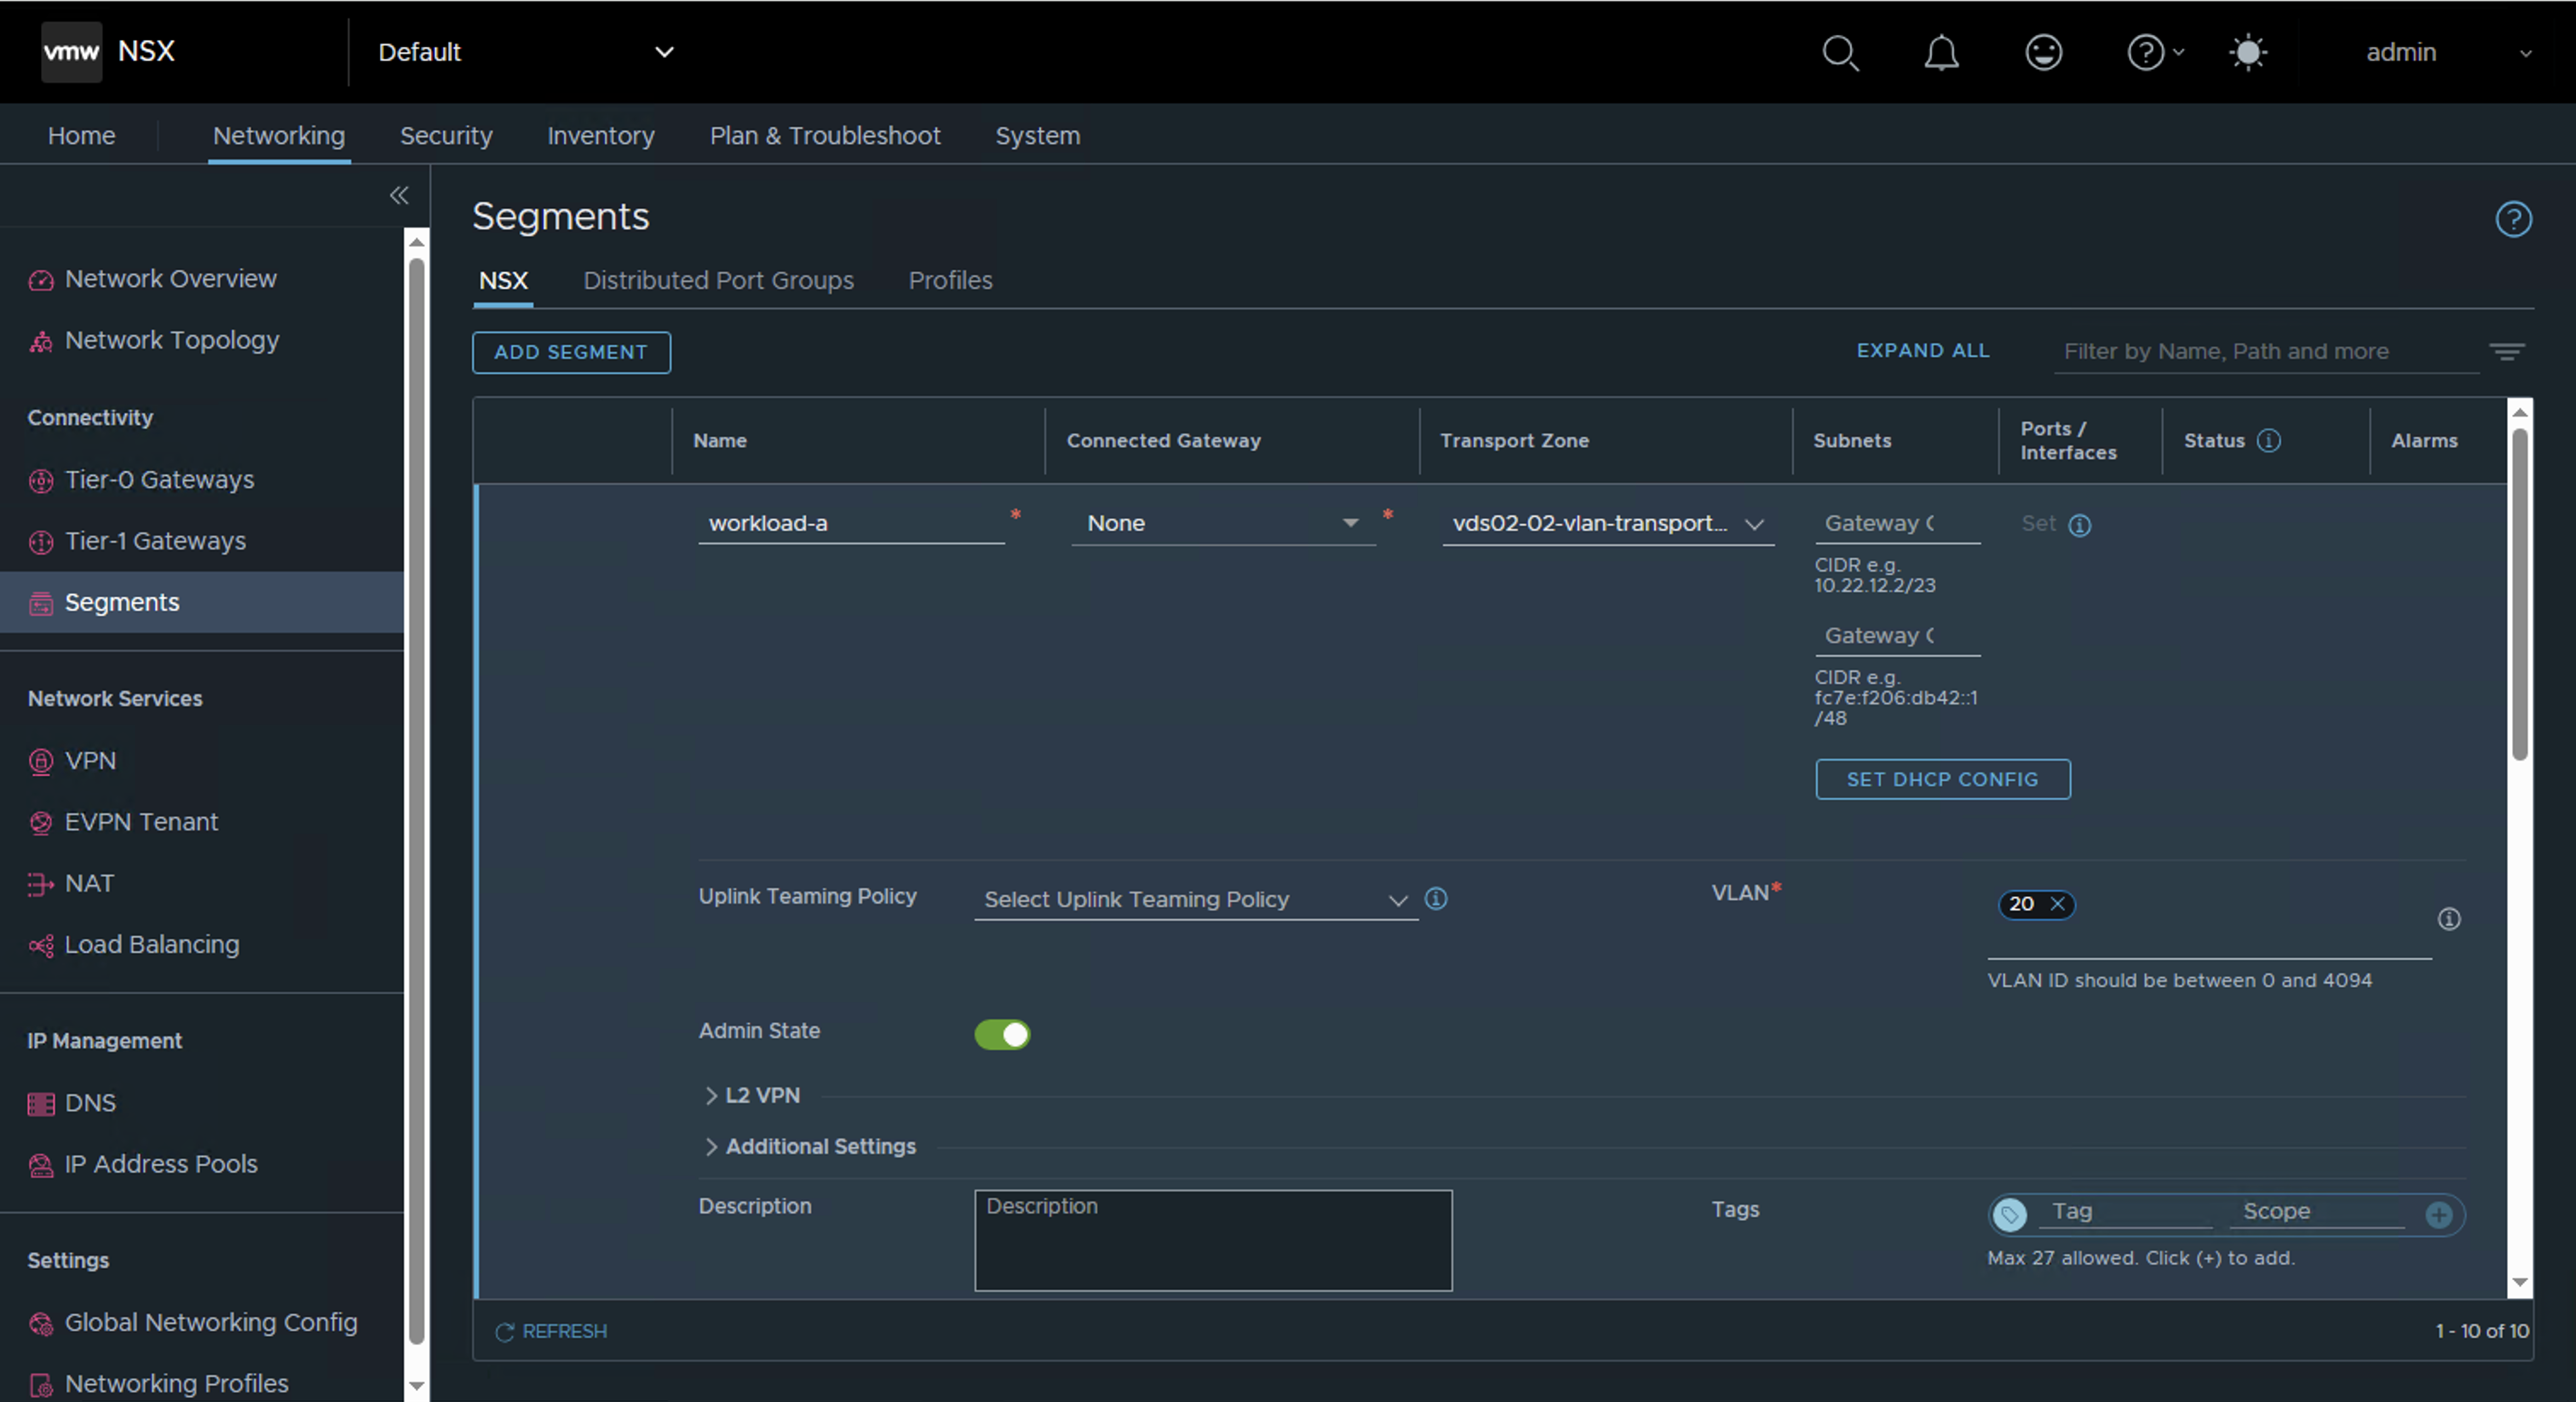
Add new NSX VLAN segments on the newly created VLAN transport zone.

Step 6: Migrate and Test
- Migrate a test VM from the VDS port group
workload-ato the new NSX VLAN segment namedworkload-a - Validate network connectivity after migration by pinging the gateway from the guest OS or pinging the VM from the physical router
Step 7: Configure Distributed Firewall
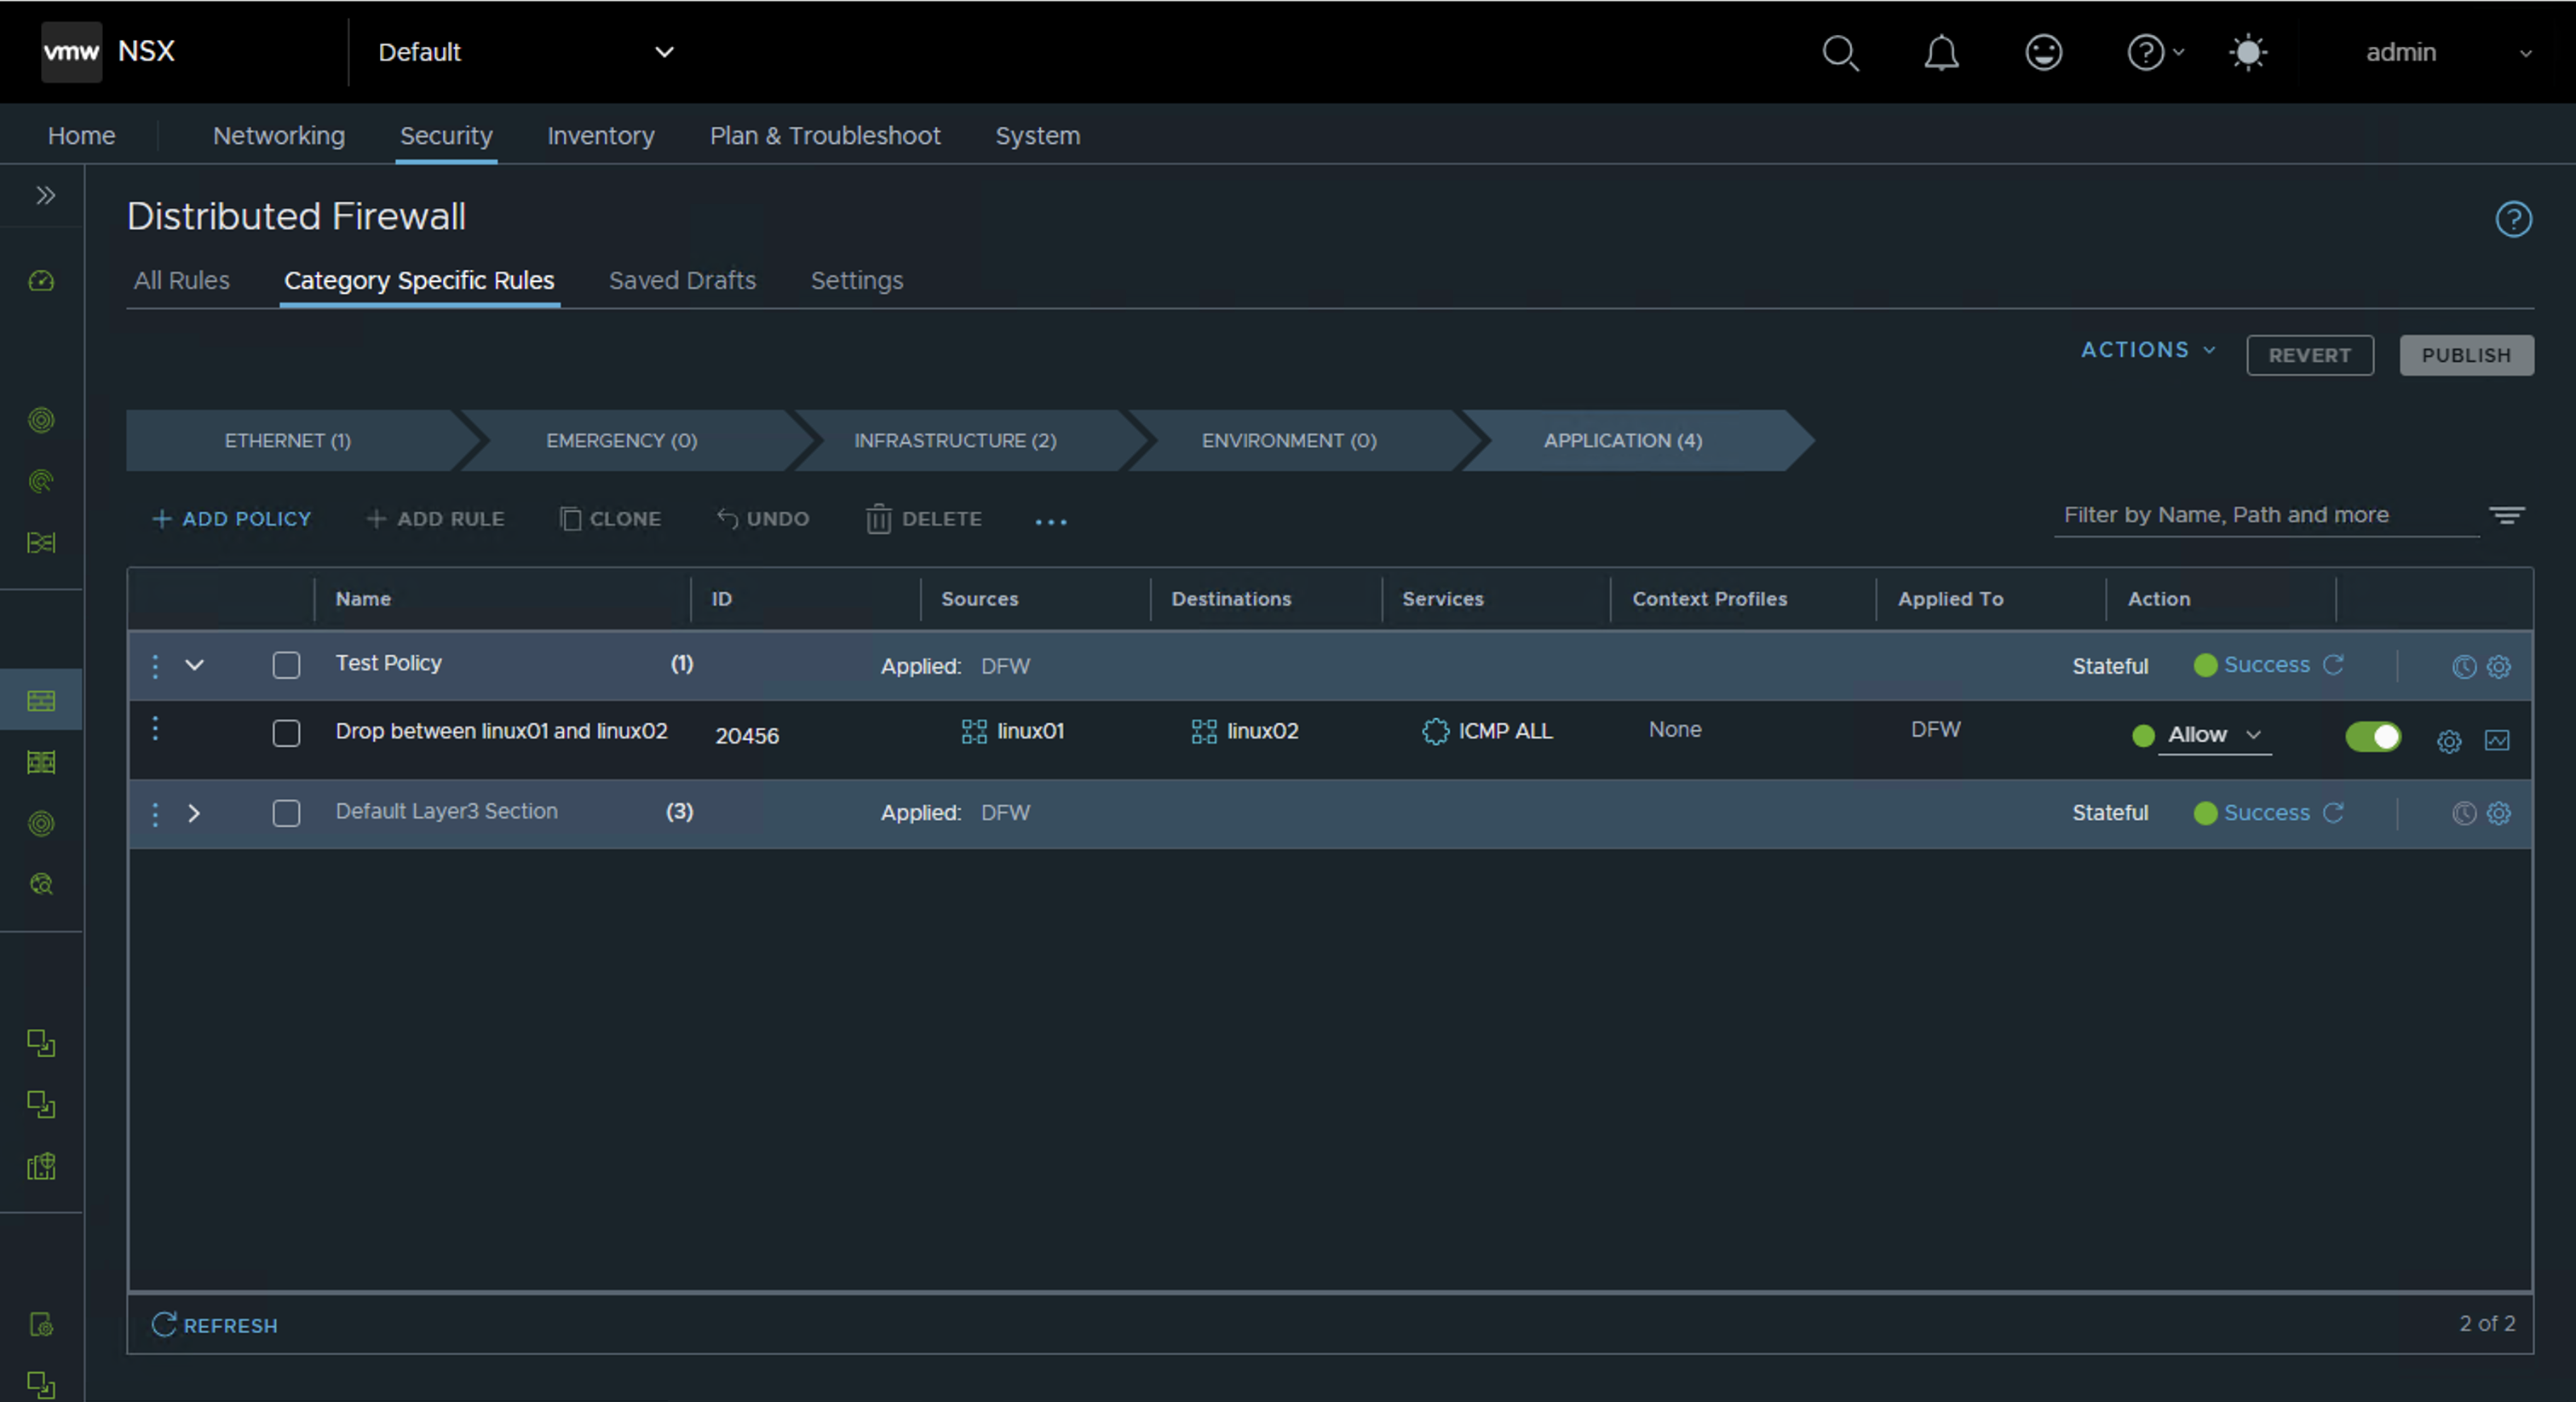
Configure a new DFW policy with rules to control communication between VMs. The policy can be set to allow or reject specific traffic patterns.
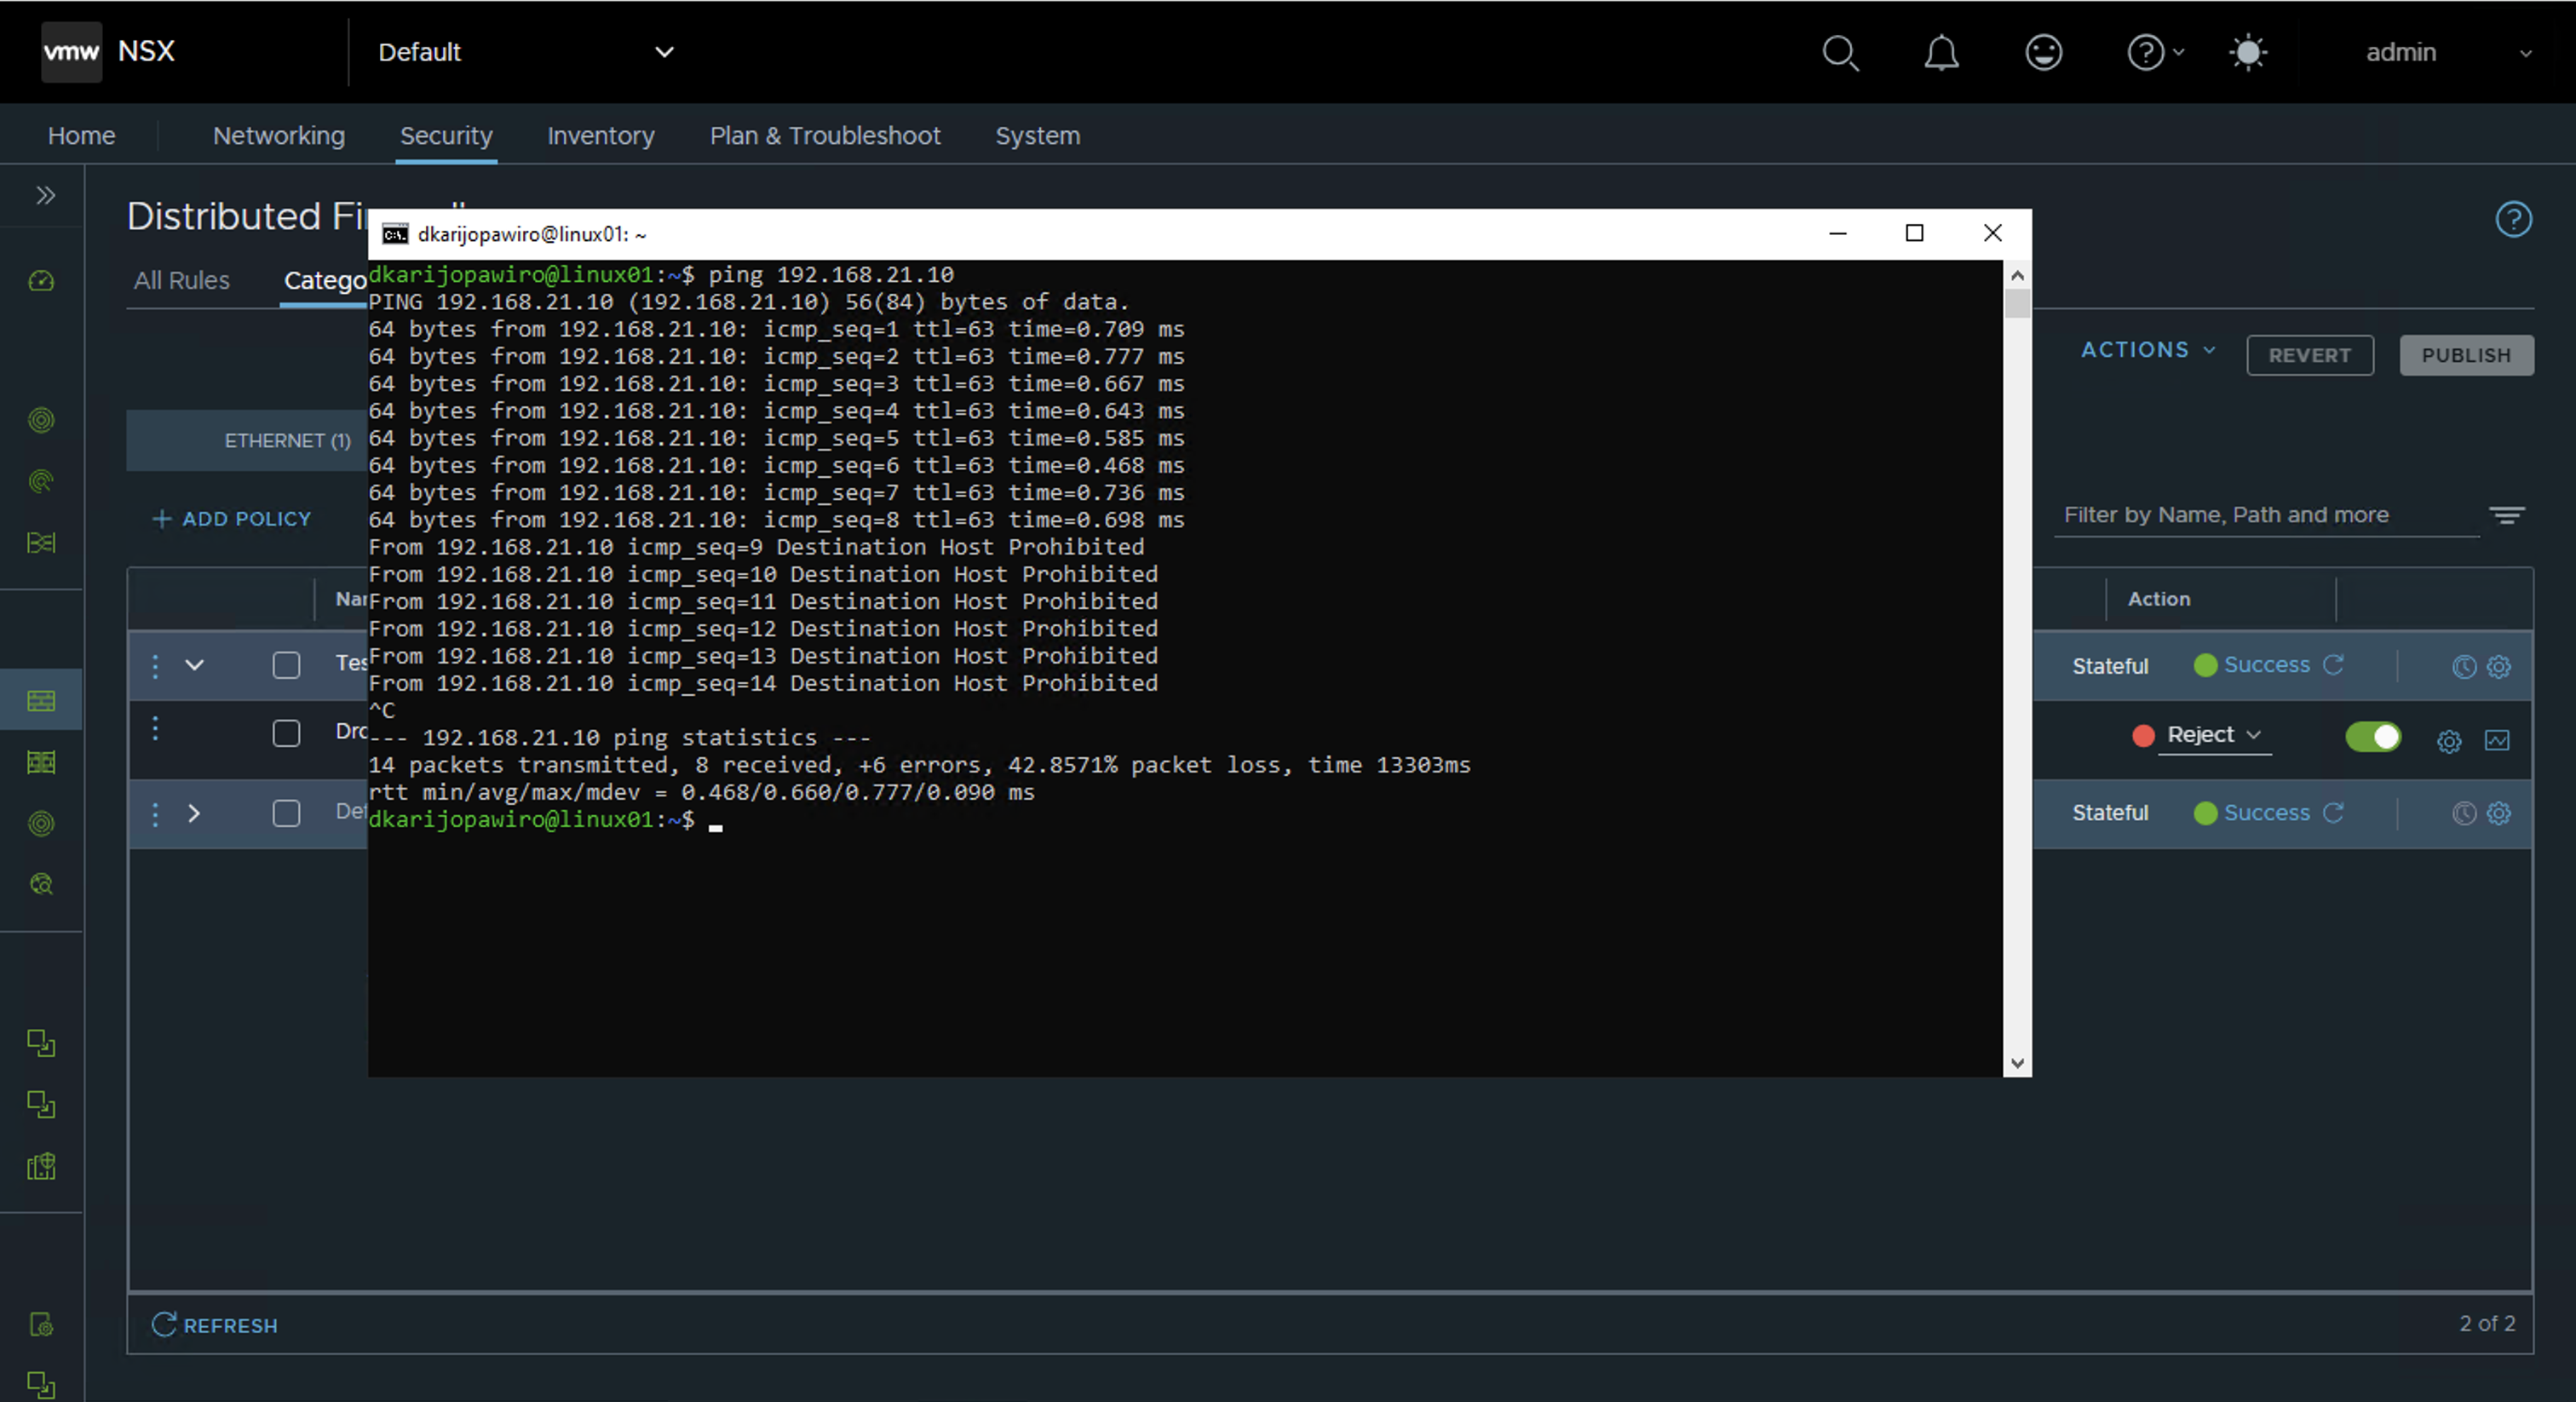
Step 8: Test Security Policies

For testing purposes, reject ICMP traffic between the two VMs and publish the updated policy rule. The ICMP traffic between those VMs should be rejected as shown in the screenshot above.
Option 2: Activating NSX Security on Distributed Port Groups
This approach enables NSX security directly on existing distributed port groups without creating new segments.
Steps 1-4: Same as Option 1
Follow the same steps 1-4 from Option 1 to configure the transport zone and host switch.
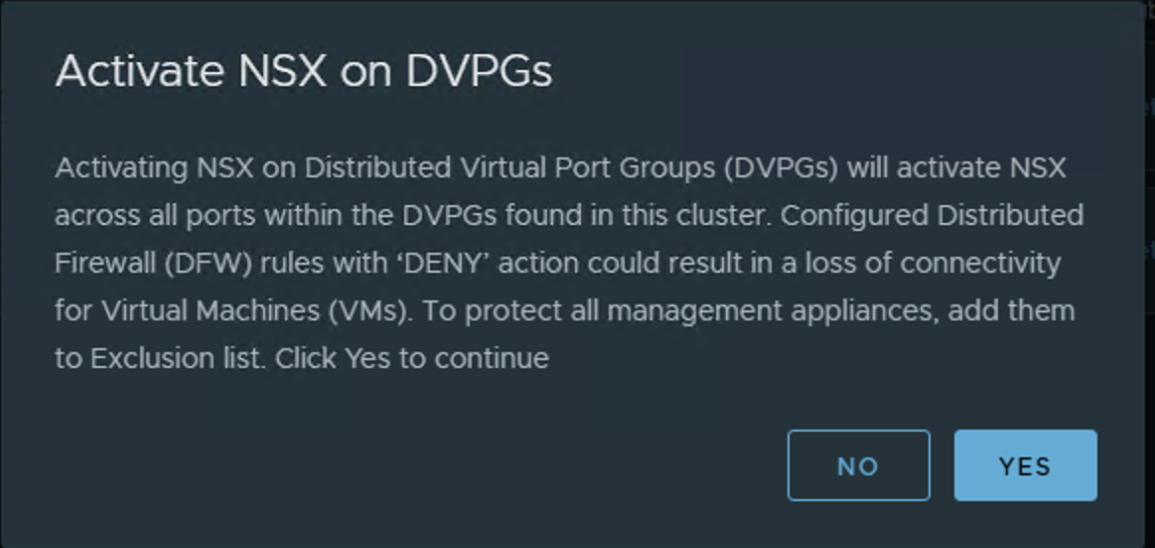
Step 5: Enable NSX on DVPGs
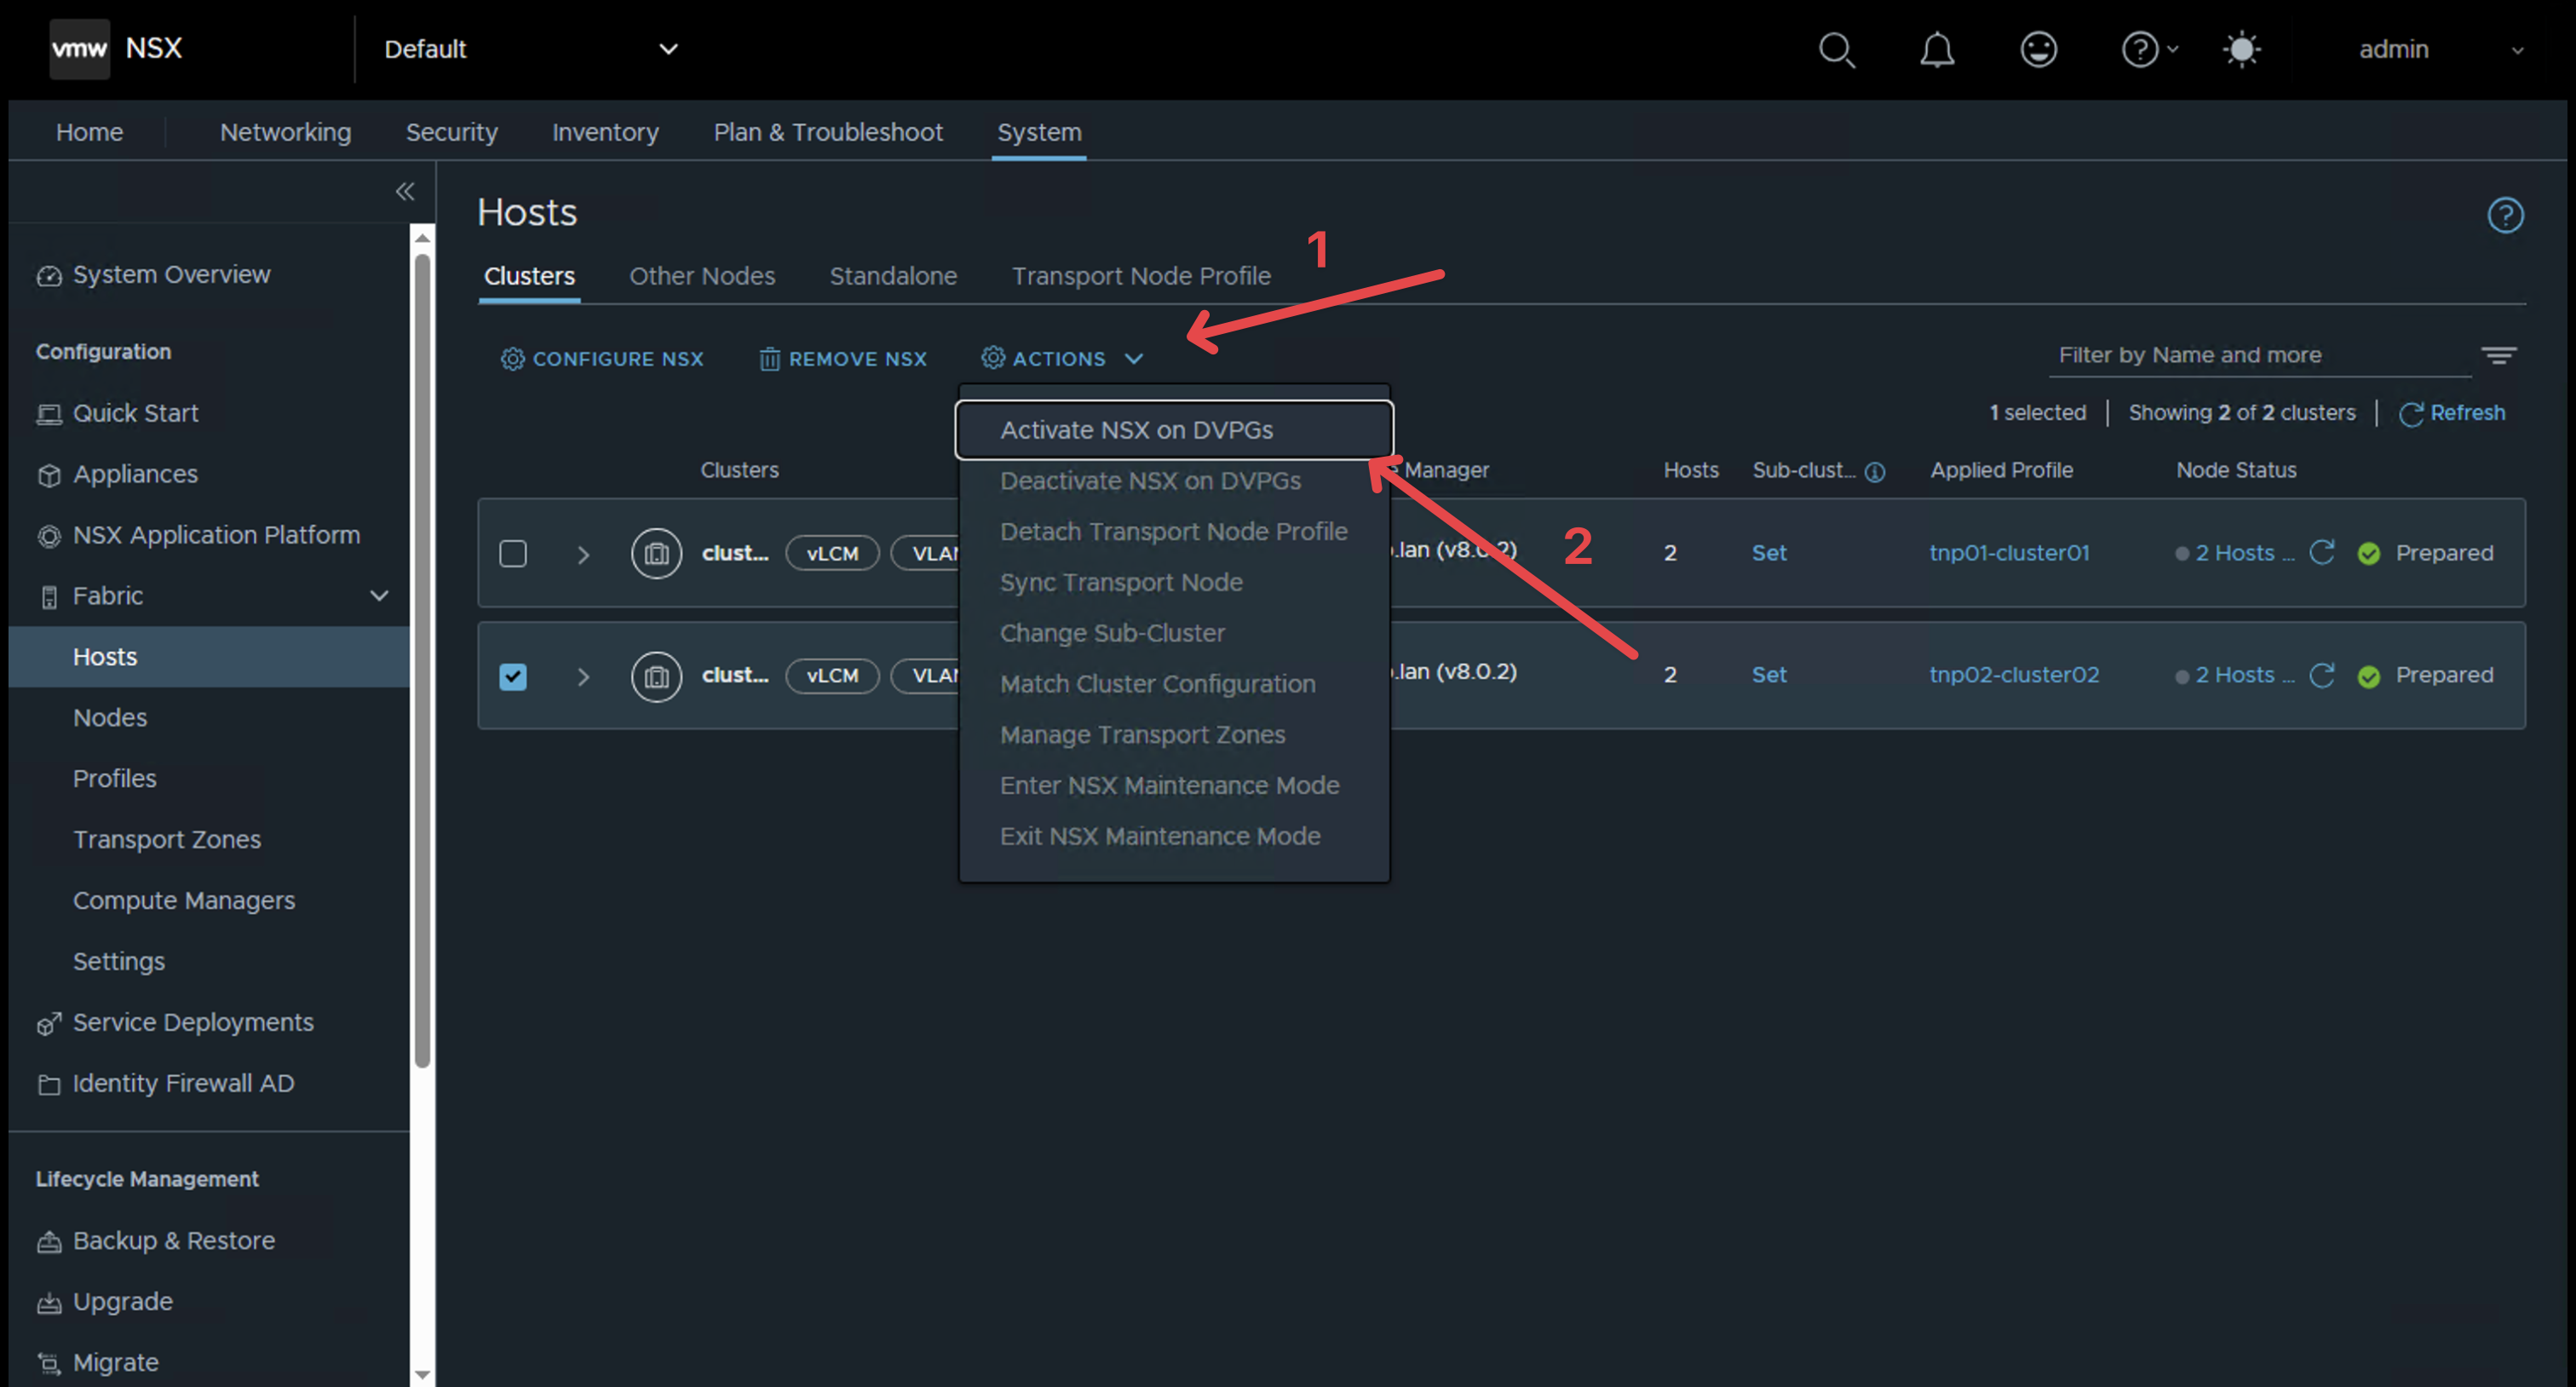
Enable "Activate NSX on DVPGs" within the hosts view under System and Fabric.
Step 6: Verify DFW Application
Once enabled, DFW will be applied to all distributed port groups of all distributed switches listed in the transport node profile under host switches. If you do not have a separation between management and NSX VDS, this will include not only workload port groups but also system port groups such as management, vMotion, vSAN, and any other distributed port groups configured on the VDS.
Step 7: Configure and Test Security Policies
Follow the same DFW configuration and testing steps as in Option 1.
Both options provide the same level of security through NSX Distributed Firewall.